

How to Build a Chair out of Wood and Netting in the Field
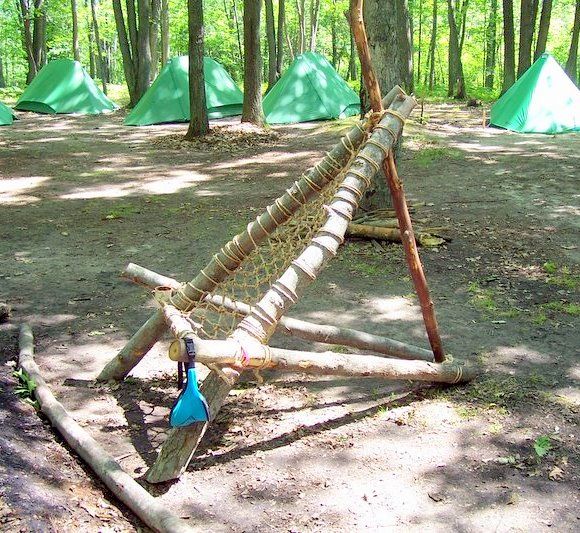
All you need to make a sturdy and semi-portable chair in the field is a few pieces of wood, a lot of rope, a survival knife and some ingenuity. The following project illustrates how easy it is to prepare and enjoy a rudimentary chair that’s actually comfortable. Take a look at the steps below and see how you can make good use of this project as well.
Building the Frame
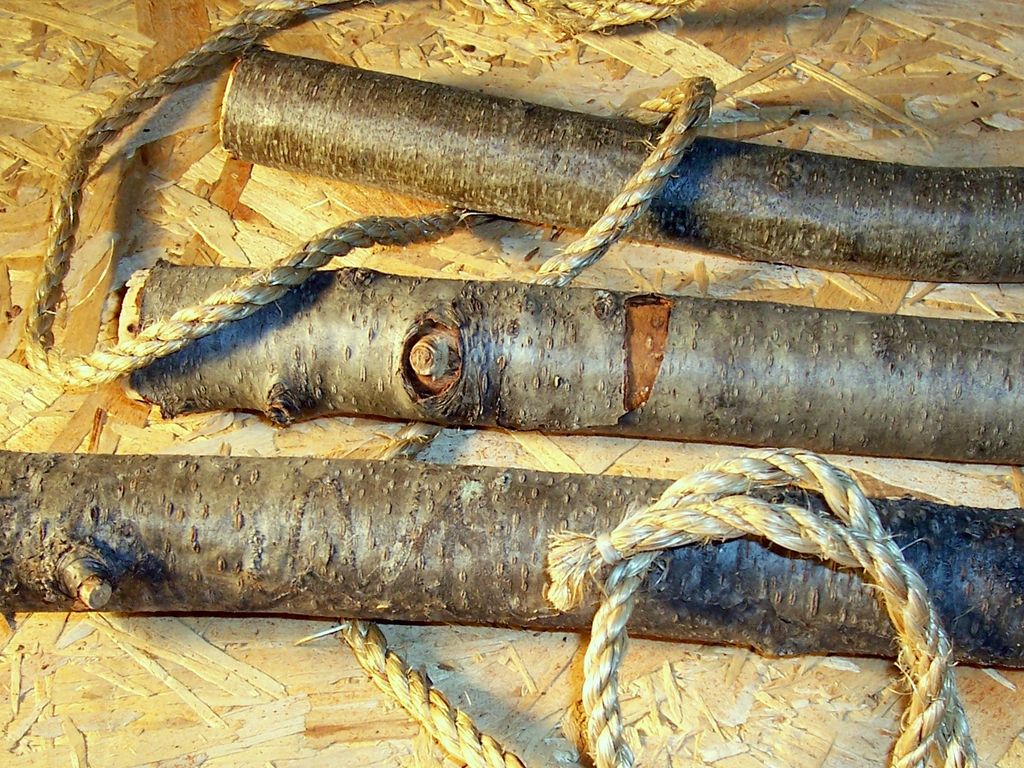
You will need six logs that are between 6-8′ long to get started. Two of them should be at least 6” in diameter and the others should be around 3-4” in diameter. Clean the wood and remove protrusions or branches. Take three branches and place them side by side. You should have two bigger branches on the ends and one shorter branch in the middle. Line them up so their top ends are at the same level.

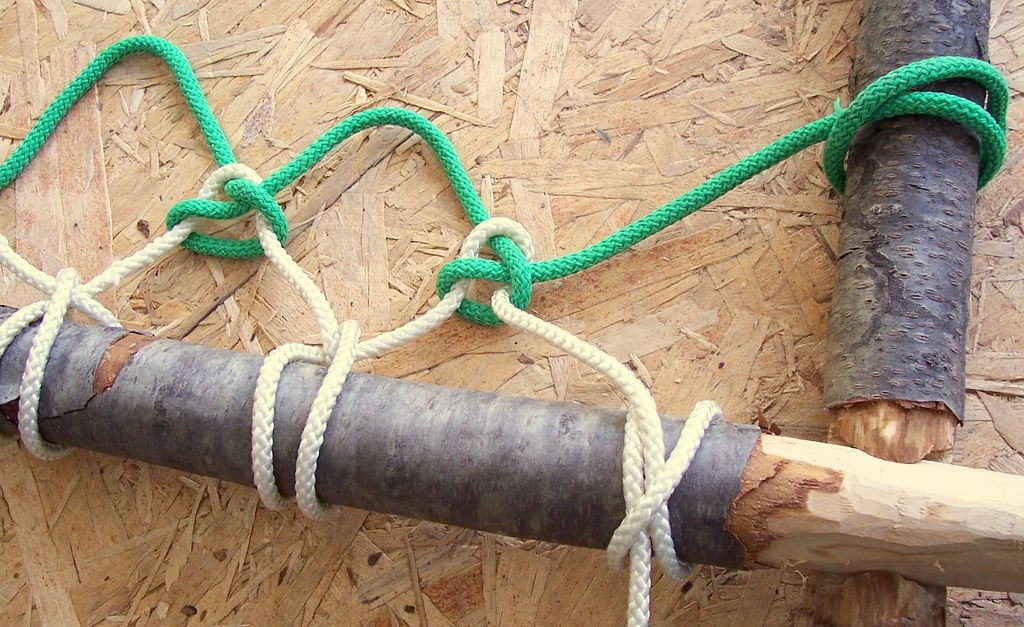
Next, you want to lash the rope around each branch to attach them together. The best way to do this is tie off one end of the rope around the top of one of the outer branches. Next, start to weave the rope around the three branches in an over-under fashion. When you get to the other end, start to weave in the opposite direction. You want at least three complete passes of weaving before tying off the other end of the rope. If you need the rope to be able to grip something if it is sliding off, cut some small divots or notches near the tops of the branches for the rope to seat.
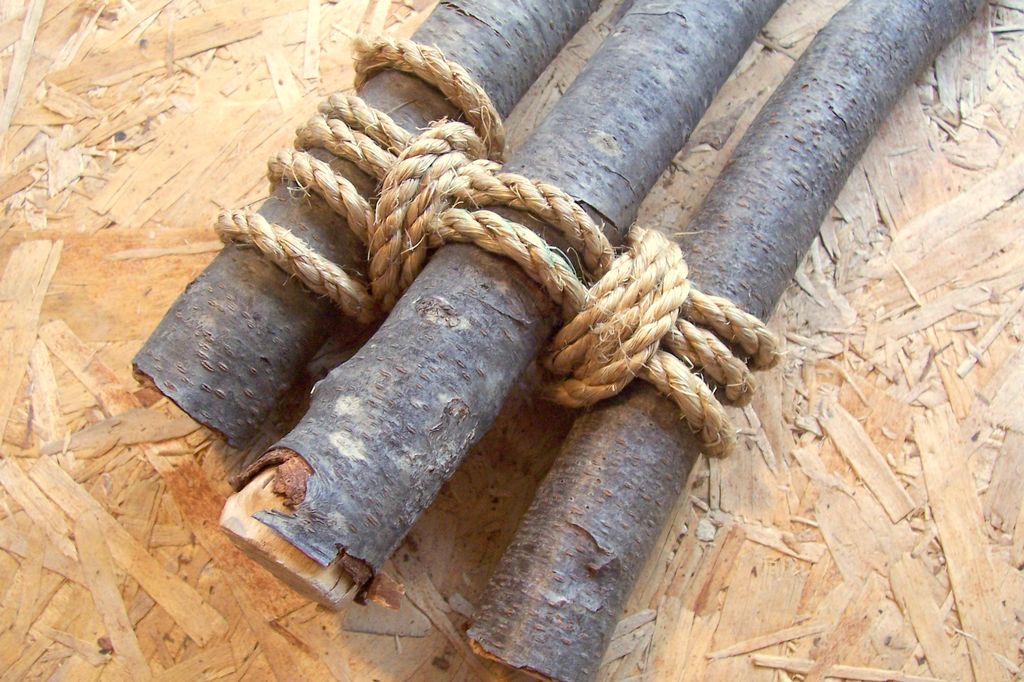
The next step is to wrap some rope around the lashing between each branch. Make a couple of passes in each gap while feeding the rope into the next space and repeating the process. Tie it off somewhere along where you secured the rope on the first branch.
Positioning and Reinforcing the Frame
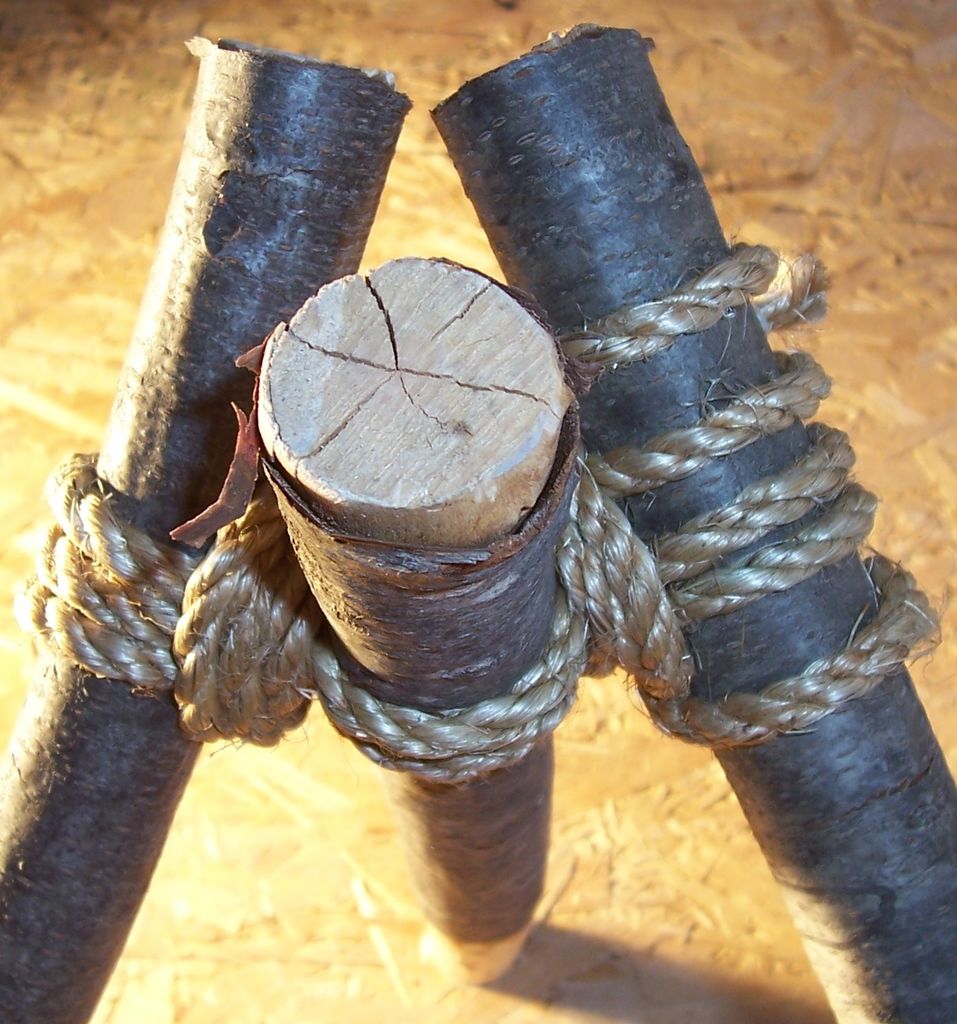
You should now be able to pull apart the tripod that you’ve just created and stand it up. Place the shorter, middle leg backward and the two longer legs should extend forward. Spread the branches out until they are spaced evenly and the frame is stable. Next, make “V” shaped connection with two of the shorter branches and lash them together at the pointed end in a manner similar to the one listed above. You also want to secure this point with the back stick on the tripod with rope. Next, temporarily secure each branch of the open V to the lower third of the front legs of the tripod.
This horizontal V should rest at about a 45 degree downward angle from front to back once installed.
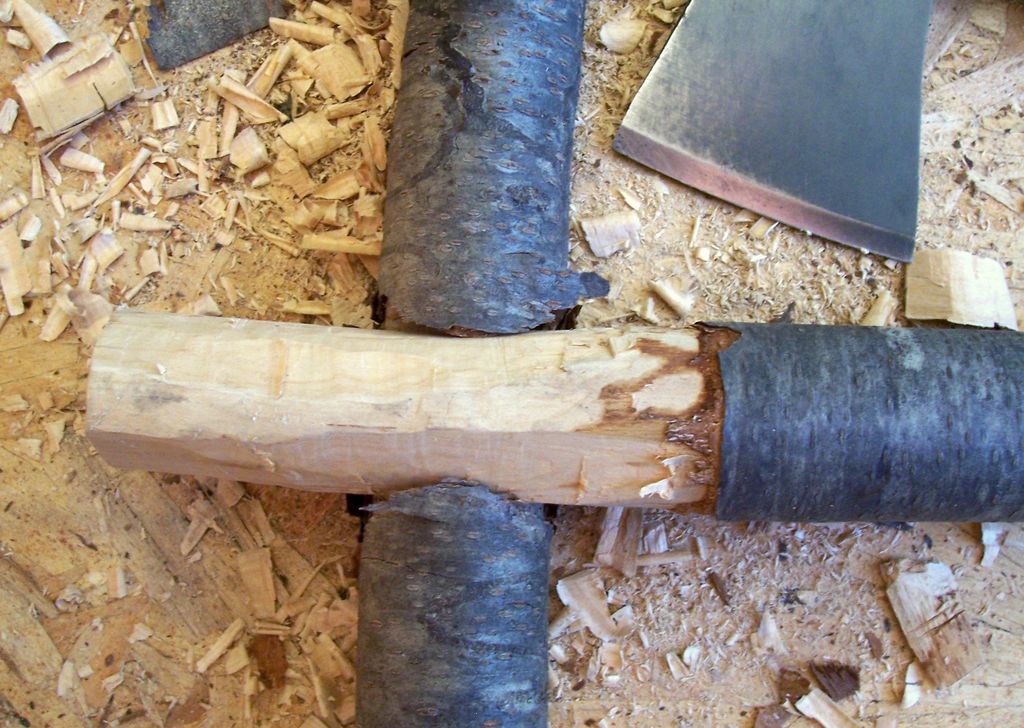
The next step is to cut out a couple of notches into the front legs of the chair just above where the horizontal V is connected to the frame. The notches should be big enough for a support beam to rest snugly against the vertical as well as horizontal branches of the frame. You want the vertical branches to rest on top of the support beam, and you can also cut some notches into their undersides in order to make the fitting more secure.
Installing the Net
To install the net, all you need to do is tie off the ends of the rope to the corresponding branches to anchor it in place. However, you want to build in enough slack so that the net will flex as it supports the weight of the people sitting on the chair. Next, take some cordage, or material directly attached to the net if possible, and wrap it around each side branch in two inch intervals. This will provide a secure fit and prevent the net from sagging or bunching up in various spots around the seat.

All you need to do now is make adjustments to ensure that all of the connections are snug. You can also adjust the angle or height of the seat to provide a more customized fit. However, this may mean placing some new notches at higher positions along the front of the frame as well. In any case, following these general guidelines can help you to turn some extra netting or cordage into a practical and comfortable chair in the field. Keep in mind that you can also make your own net if you have enough cordage on hand as well.
Try this out for yourself and see how this project can be a welcome addition to your survival bag of tricks.
More Articles From This SIte
 Tips for Organizing Your Time in a Long-Term Survival Situation
 Financial Considerations Associated With Survival Planning
 Do You Want to Feast on These Great Depression Foods?
 The Top 3 Tips for Improvised Floatation Devices
 How to Catch Bait and Small Fish With a Plastic Bottle
 Sand casting demo… Making a practice knife with sand casting


