How to Make a Gun Rest from PVC Pipe
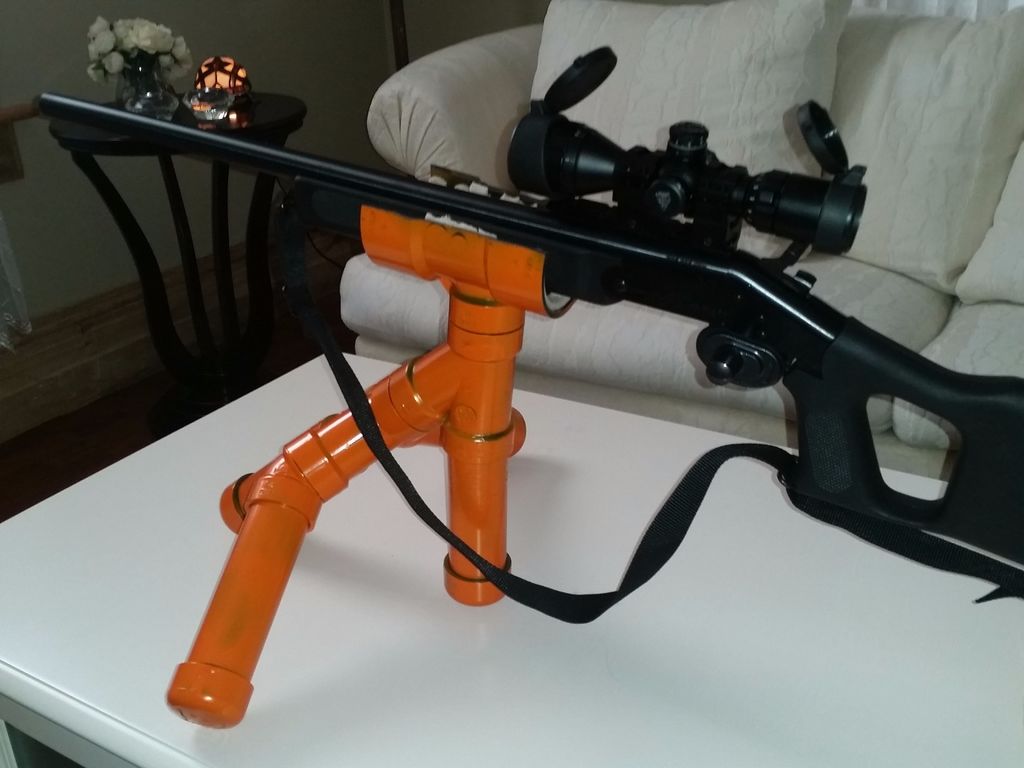
Gun rests are a very useful tool in the field when you are stalking prey for a prolonged period of time. They also help to eliminate the need to find appropriate-sized logs or debris to hold the weapon in place while you wait for the target to emerge. While you can buy one of a million rests in stores, you can also make your own customized version at home with some PVC pipe and basic material for a fraction of the cost. Look at the basic design below, and see how you can apply the same principles to make a rest that is perfect for you.
Required Material
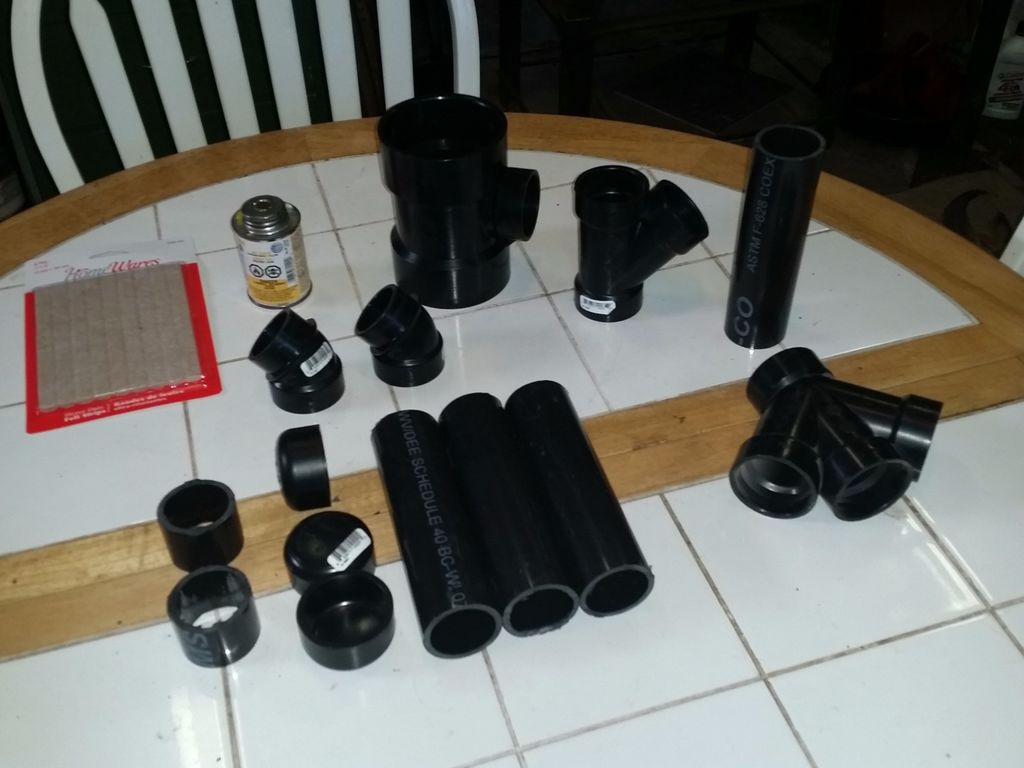
2 ½ feet of 1.5 inch diameter PVC pipe
1.5 inch diameter three to one fitting
1.5 inch diameter T fitting
4 end caps that are 1.5 inches in diameter
2 45 degree fittings
1 3 inch T fitting with an end that is 1.5 inches in diameter
PVC adhesive
Velcro or adhesive felt
Saw
File or sandpaper
Cutting the Pipe
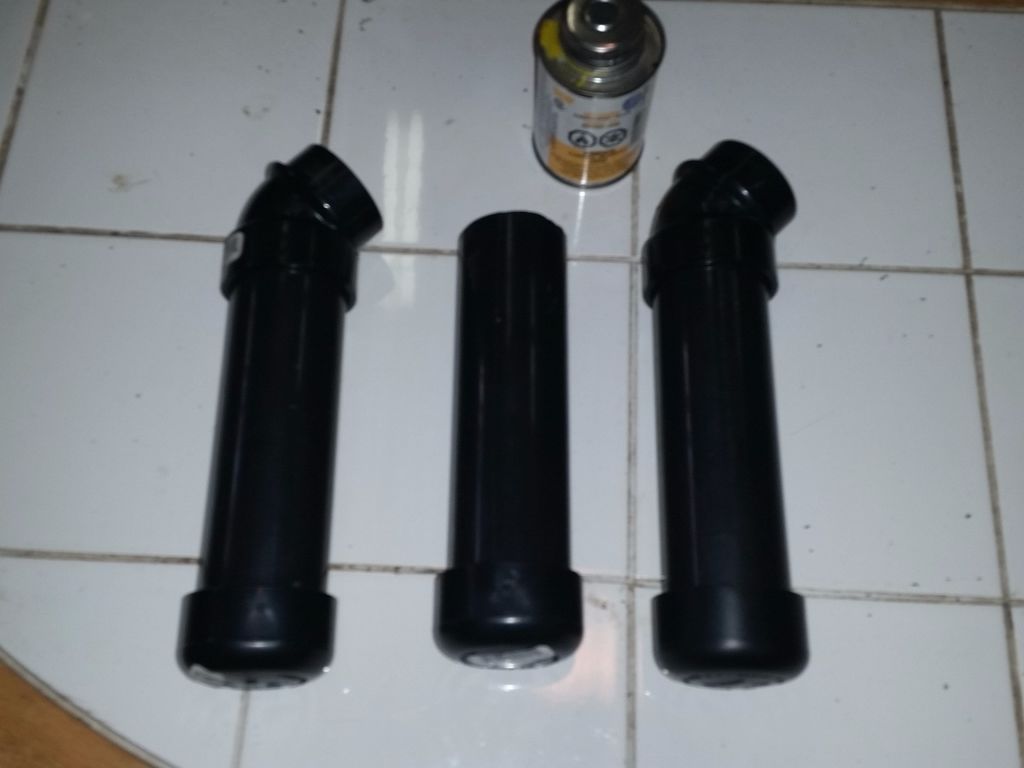
The first step is to cut the large pipe into segments that will become the legs. Cut two sections for the angled legs that are 6 ¾ inches long. The next section will be for the center leg, and this piece should be 6 inches long. The remaining pipe will be used for the fourth leg that will be sized and fitted later on. Keep in mind, that you can adjust the height to your own specifications as long as you keep the ratios the same. Simply use longer or shorter pipe and make the cuts accordingly.
The next step is to attach the end caps to each of the three legs and the 45 degree angled fittings to the two shorter legs. Secure the caps with adhesive, but do not glue the angled fittings. This will allow you to disassemble the unit as well as make minor adjustments as necessary later on.
Assembling the Base
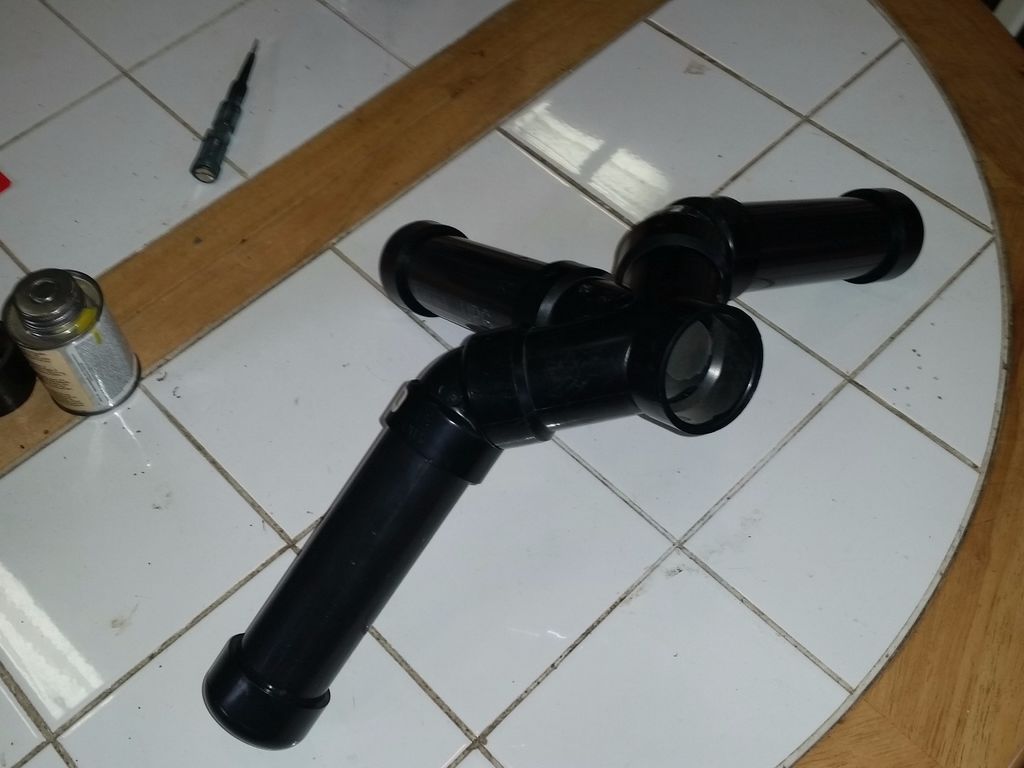
Attach the two side legs to the side holes of the three-way T fitting. Then, attach the shorter, center leg into the center hole that is situated between the two angled sides. Make sure that you put the center leg in the hole that faces the same direction as the angles. The other hole on the opposite side of the T fitting should be left alone. The next step is to adjust the legs so that they rest perfectly on a flat surface without wobbling. You can then either glue them in place for a permanent connection or just twist and slide them into position to make them easy to disassemble. The only concern will be whether or not the fittings are secure enough to hold the legs in place if you choose the latter option. You can always apply some tape to the outside of the fittings if you want to stabilize the unit.
Fashioning the Cradle
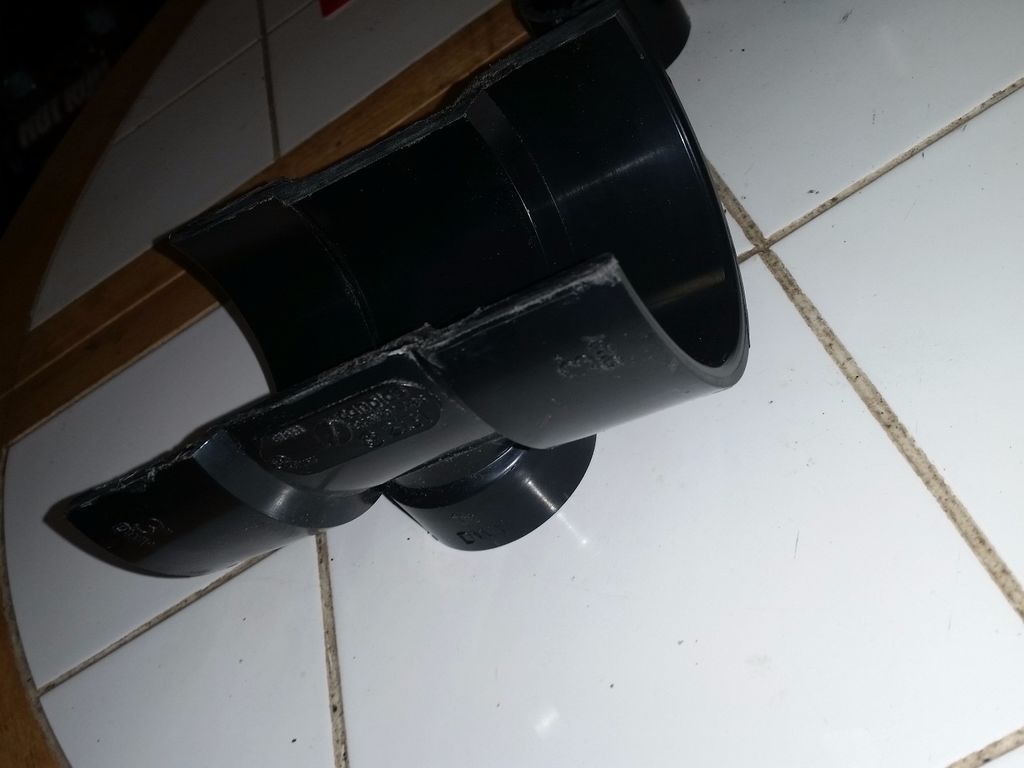
The next step is to create the cradle that will hold the gun in place. To do this, you need a clamp to hold the PVC pipe in place and a saw to cut it in half lengthwise. Take the three inch T piece and insert the fitting into the vise or clamp. Then cut the piece in half and file or sand down the edges to make the surface smooth.
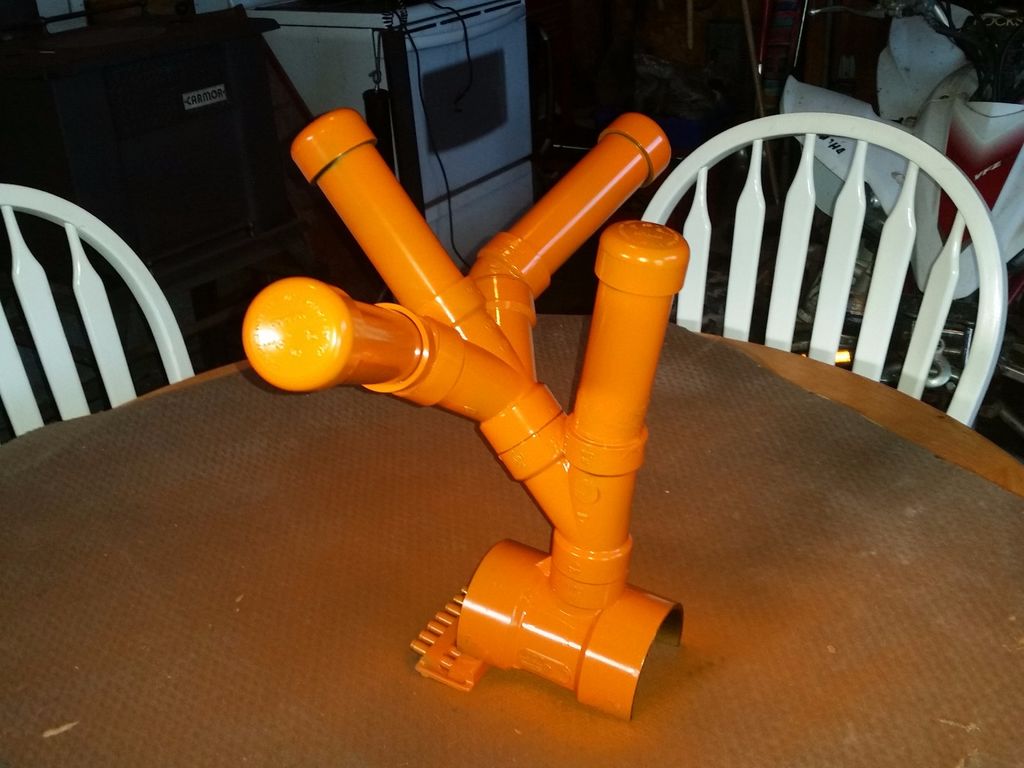
Finally, connect the cradle to the angled fitting, and attach this fitting to the remaining hole on the three way piece. Then measure the fourth leg so that it will be even with the other ones after inserting it into the opposite end of the angled fitting. The finished product should have four legs. Two will extend outward and back at an angle, the center one will extend outward in the front, and the fourth leg will extend vertically in the back. Double check to make sure everything is level and you’re good to go. Simply mount the gun in the cradle and enjoy this makeshift holder.
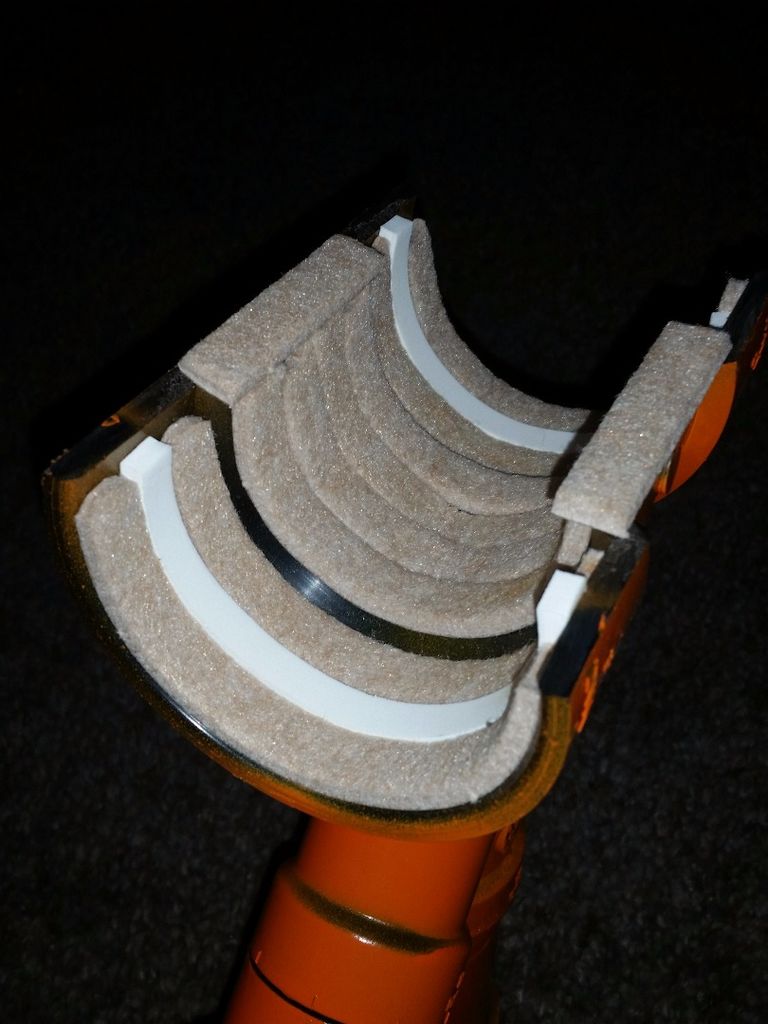
The only other consideration is that you should check to ensure that the cradle is level so the gun will seat properly. You can also adjust the angle of the gun as well as secure it into place by using some adhesive felt on the inner-walls of the cradle. Remember that you can adjust the length of the legs by using more or less PVC pipe, and this unit can be solid or built for quick assembly or dis-assembly.
Nothing could be easier, and this is another example of why it’s such a good idea to keep some PVC pipe on hand for various projects that can make life a lot easier during a survival situation.