How to Make a Simple Wood Carrier Out of PVC Pipe
If you have some rope or cordage, a couple of pieces of PVC pipe and some basic tools, you can create a practical and easy-to-build wood carrier in just a few minutes. This is a very simple project that may not seem like a big deal now, but it can end up making life a lot easier out in the field. Follow the steps below, and see how easy it is to create your own wood carrier today.
Getting Started
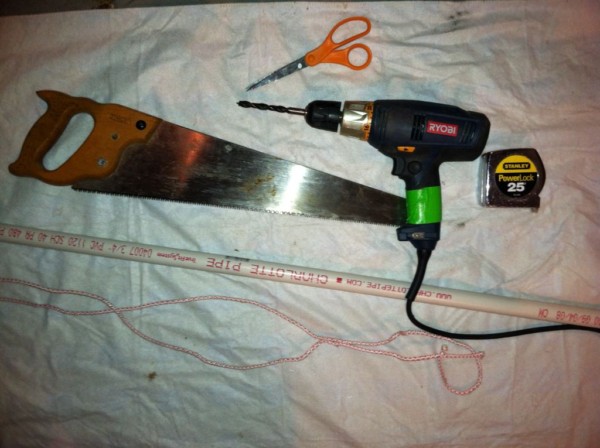
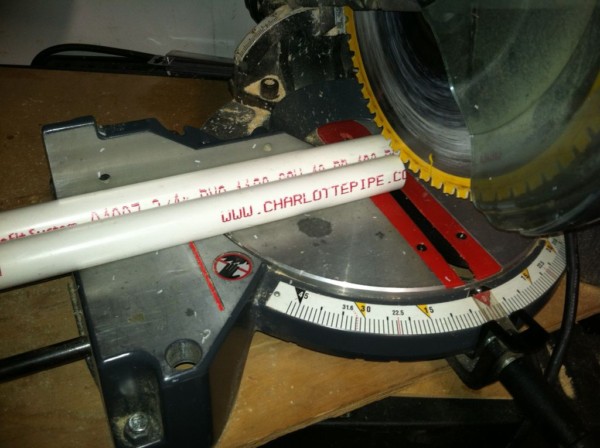
All you need is about 12 feet of rope or cordage and 2 feet of PVC pipe that is at least ½ inch in diameter. Consider inch-wide PVC to handle heavier and larger loads. The first step is to cut the pipe down the middle so you are left with two, foot long segments. Sand or file down the ends to make them smooth and prevent accidental injury when using this accessory later.
Keep in mind that you can substitute wood dowels, a broom handle or a sturdy branch for the PVC pipe. However, you will also need a drill or some other tool that will allow you to bore holes through the wood. If you use PVC pipe, you can use the tip of your survival knife, a screwdriver or other pointed object to create the holes if you don’t have a drill available. PVC is also smooth, which means that you reduce the risk of getting jabbed or slivered from handles made from dowels or branches. If you do use wood, make sure that the surface is sanded down and smooth to make handling them easier and more comfortable out in the field.
Building the Carrier
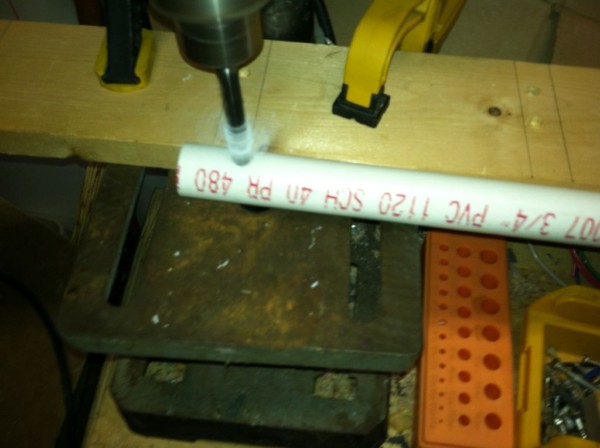
The next step is to drill or poke two holes into each side of each piece of pipe. Make the holes about an inch inside of each end of the segments. You also want to align the holes so that they will be in the same position on the tops and bottoms so the rope or cordage will fall straight through.
Next, feed the cordage through the holes on one of the segments and tie them off with a knot at the top to secure them in place. Feed them through the holes on the bottom segment and tie off the end with a knot against the bottom holes. When you’re done, you will have two bars of pipe connected to two pieces of string, and everything should be pretty well-aligned and level.
Check for alignment by resting the bottom piece on the ground and lifting the rope by the top bar until it is taut. If it is level, then you’re good to go. If the bottom piece lifts off the ground at an angle or you notice that something else is out of alignment, simply shorten or lengthen one of the ropes and knot again once everything is level.
Using the Carrier
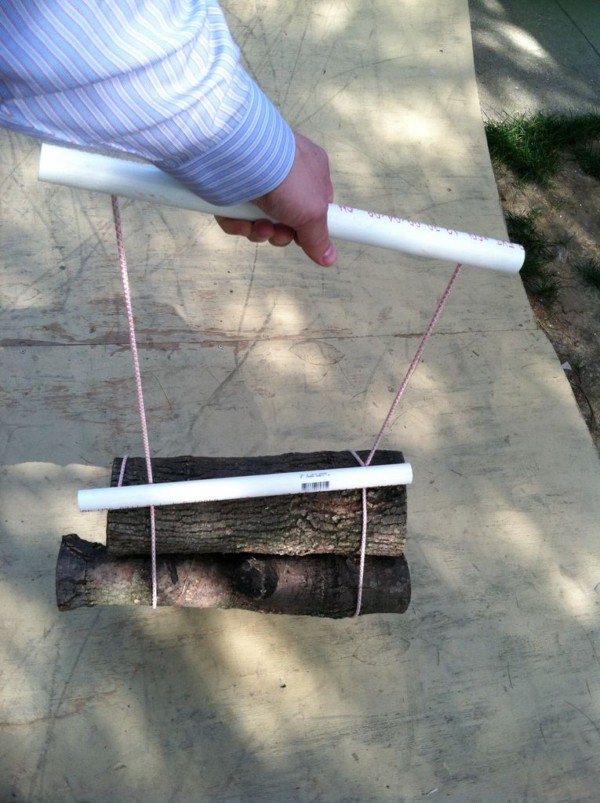
To use the carrier, spread it out on the ground and place the wood perpendicular to the cordage. Position the wood so that the ends of each piece are centered in relation to the cordage in order to keep the carrier balanced as the wood is being transported. Bunch the wood up in the center third of the carrier, making sure that there’s enough cordage on either side to wrap around the wood. All you need to do now is feed the top bar through the cordage leading to the bottom one and pull. This should cause the bottom bar and cordage to lock around the wood and allow you to carry it by using the handle.
There is also a lot of room for improvisation with this simple project, so feel free to think of ways to build on the basic concept outlined here. Keep in mind that this carrier can be used for things other than wood as well, and this is another reason why this simple accessory can be so practical and useful in the field.