How to Make an Boot Dryer Out of PVC Pipe
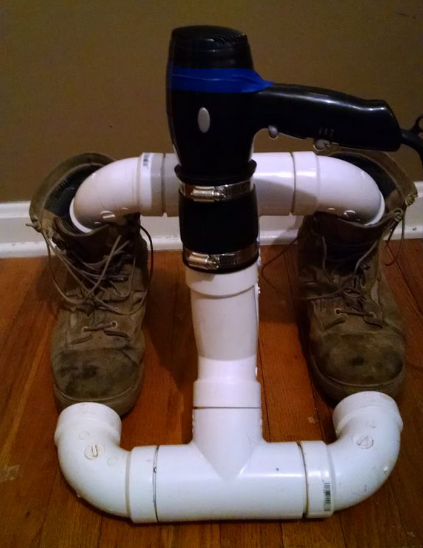
If you’re looking for a way to dry boots quickly and easily, then this trick is for you. All you need is some PVC pipe, a blow dryer and some other components to create your own drying system. While this project has plenty of room for improvisation, it beats having to let your boots dry out next to a fire or in the open air.
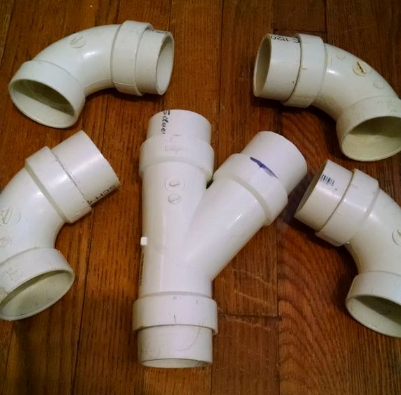
Required Items
At least three feet of 2” diameter PVC pipe
Two 2” diameter T connector
One 2” diameter Y connector
Four 2” inch diameter elbow joints
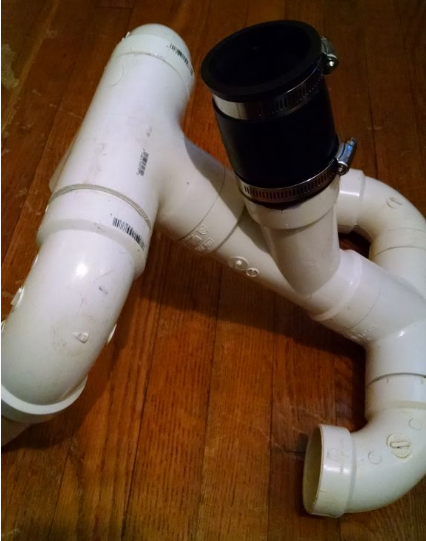
Two clamps
1 thermal coupling that is 2” in diameter
1 insulating sleeve that will wrap around the thermal coupling
Epoxy
Blow Dryer
Cutting the Pipe

The first step is to cut off a 16 inch long section of pipe and then cut that piece in half at a 45 degree angle. This will give you two 8 inch pieces that have a taper on one end. Next, You want to cut two wedges to form an eye about an inch above the angled end of each piece. These cuts will help to move air through the boots once the system is up and running.
Next, you want to cut seven, two inch long sections of pipe from the remaining material. These will serve as sleeves that connect the various joints throughout the unit. Attach one sleeve to each elbow joint, leaving one end bare. Then, insert a sleeve into each end of the Y joint. Seal the sleeves to the joints with epoxy and let dry.
Assembling the Unit
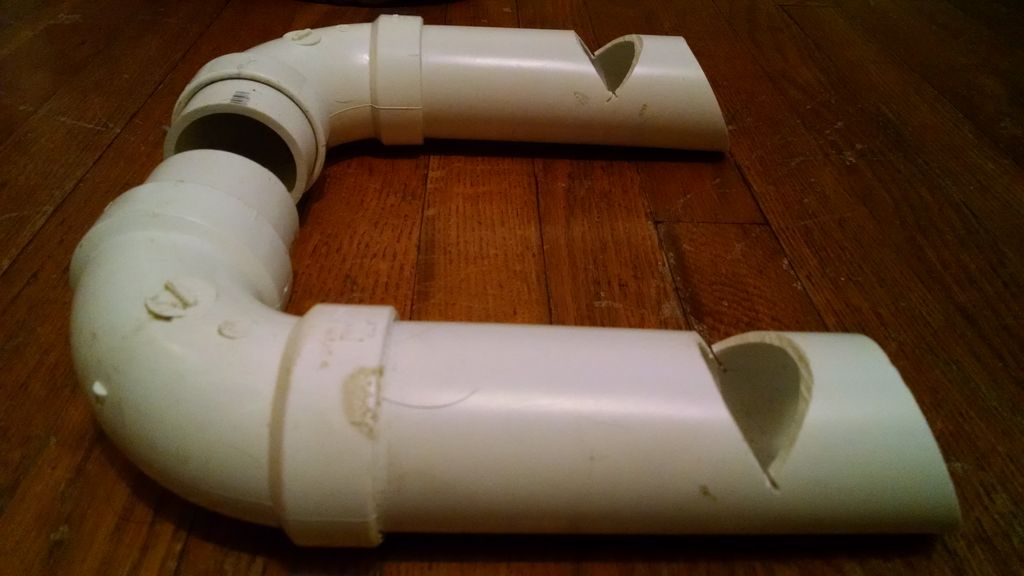
Take the two pieces with the notches in them and attach them to the un-sleeved openings on two of the elbow joints. Orient them so the elbow joints face each other while the notches are at the bottom of the pieces. Glue these sections together with the epoxy. Next, attach the two elbow and leg sections to the T piece by inserting the sleeved end into the left and right holes respectively. Do not glue them yet, in case you have to adjust their position after assembling the unit. Rotate the T joint so that the opening is facing up when you lay the leg and elbow sections flat on the table or ground.
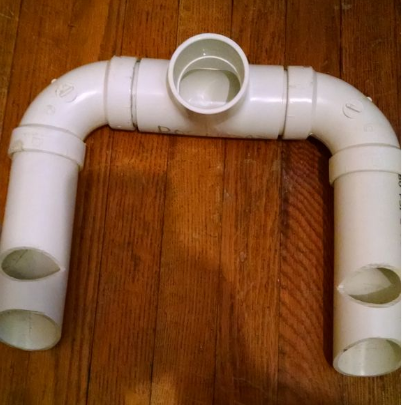
Next, attach the two other elbow joints to the other T connector and rotate them so the openings are resting on the surface facing inward. Attach the first assembly, with the long, notched legs to the top of the Y connector. Attach the second assembly to the bottom. At this stage, the unit should be resting on an angle with the legs propping it up on one end while the rear elbows are flush against the surface facing the front. Align everything as necessary to prevent the unit from wobbling or rocking.
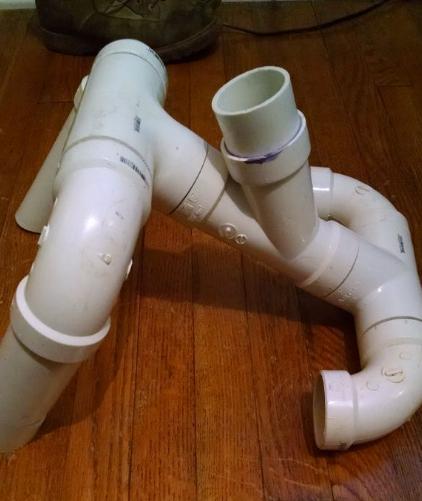
Next, attach the thermal coupling and sleeve to the top, sleeved hole on the Y connector. Secure in place with epoxy and then attach the two clamps to hold the insulation in place. Double check that all of the connections are secure and glued. Wait for the unit to dry and you’re good to go.
Insert one long leg into each boot so that the toes are facing the elbow joints on the surface. Insert the blow dryer into the thermal coupling, plug it in and turn it on. Air will start to move through the system and dry the boots from the inside and out. The only thing to worry about with this project is choosing a blow dryer that is narrow enough to fit into the thermal coupling.
You may also want to use one that has different heat and speed settings in order to find the ideal combination for drying your boots. Other than that, feel free to adjust the length of the legs to fit different types of boots and make any other modifications that will improve the basic design of this project. Try it out for yourself today and see how this simple design can allow you to dry your boots in a shorter amount of time.