You never know when you will need to make an emergency compass to orient yourself in a wilderness survival situation. This is why it’s so important to know about as many tricks as possible, so you can use them if and when they become applicable. Let’s take a look at a simple one that involves a little bit of duct tape and some other common items. It can be put together in just a few minutes, and it is also designed to be compact and portable.
Required Items
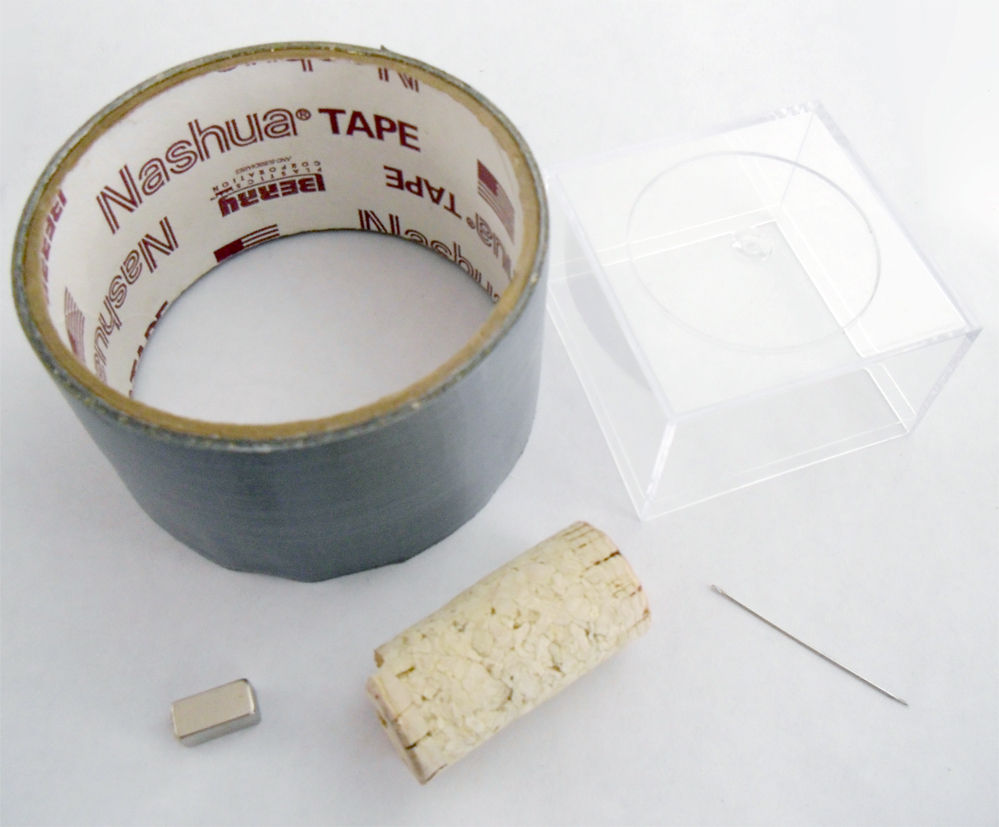
All you need for this project is a few strips of duct tape, some cork, a pin or needle and a small magnet. You can use anything from the piece of metal in your headphones to a component on a circuit board for the magnet, and there are also magnetized rocks found in many wilderness areas as well. Take time to learn more about how to obtain small amounts of magnetized material so you will know where to search during an emergency.
Preparing the Material
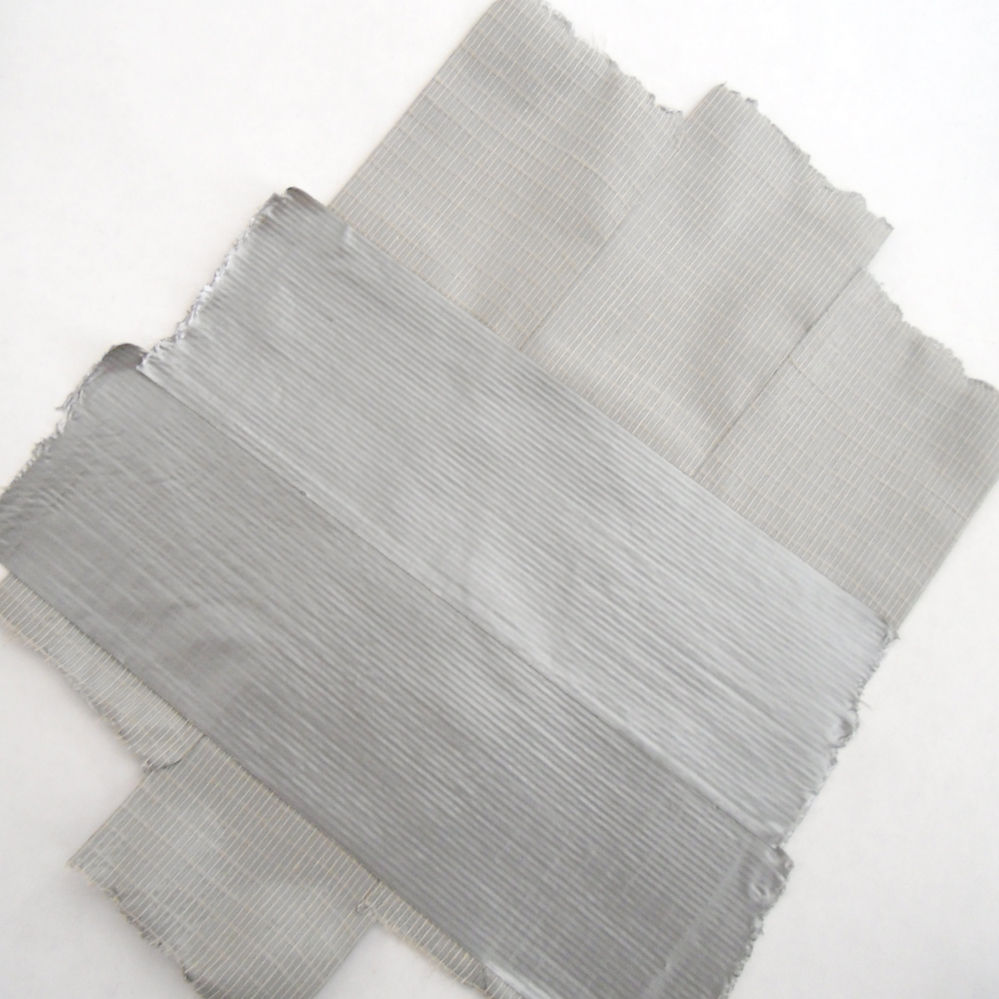
The first step is to create a tray or “boat” out of a few strips of duct tape. This will contain the water that will hold the magnet once you use this trick. Take a strip of duct tape and place it sticky side up on a flat surface. Take another strip that’s a little shorter and place it next to the longer one and let their borders touch so they stick together. Do the same thing for the other side. You should end up with 3 pieces that are vertically-connected with the longer piece having a tab that sticks out in the middle.
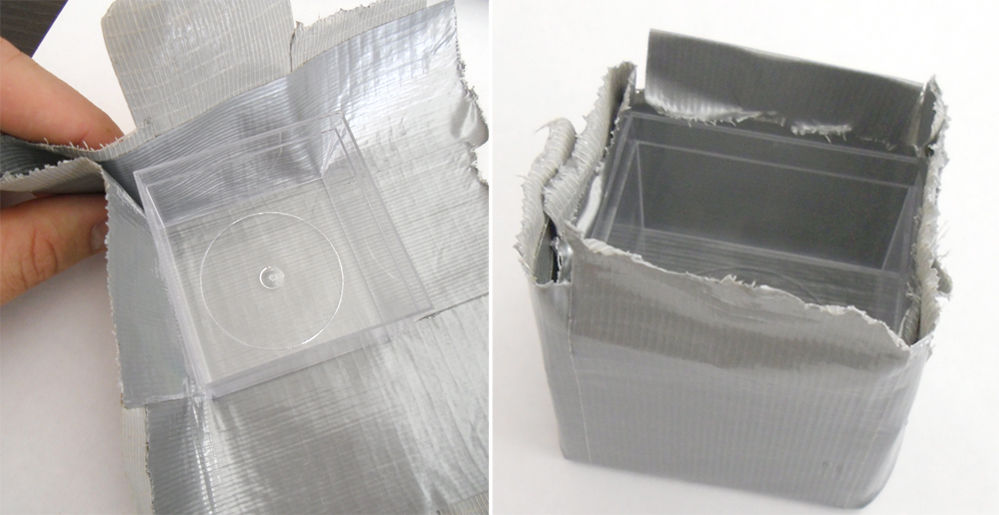
Next, take three strips of duct tape and place sticky-side down on top of the mat you just made. Make these pieces slightly shorter than the other ones. This will allow you to fold over the edges when it comes time to mold the boat and help it to retain its shape. Place the square of tape inside a small plastic container and press the material against the bottom and up the side walls. Crimp the edges so that they fold up and press the corners to hold everything in place. Remove the tape and press and fold the edges again for a more secure fit. The bowl only needs to be an ½ inch or so deep, so feel free to trim any excess tape once you’ve completed this step. Add additional strips as necessary to make the inside and outside of the bowl secure and stick-free before trimming.
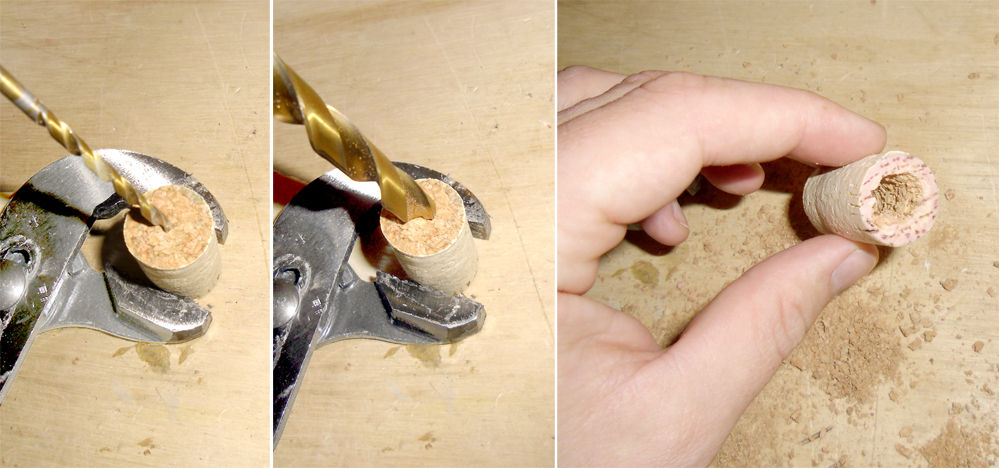
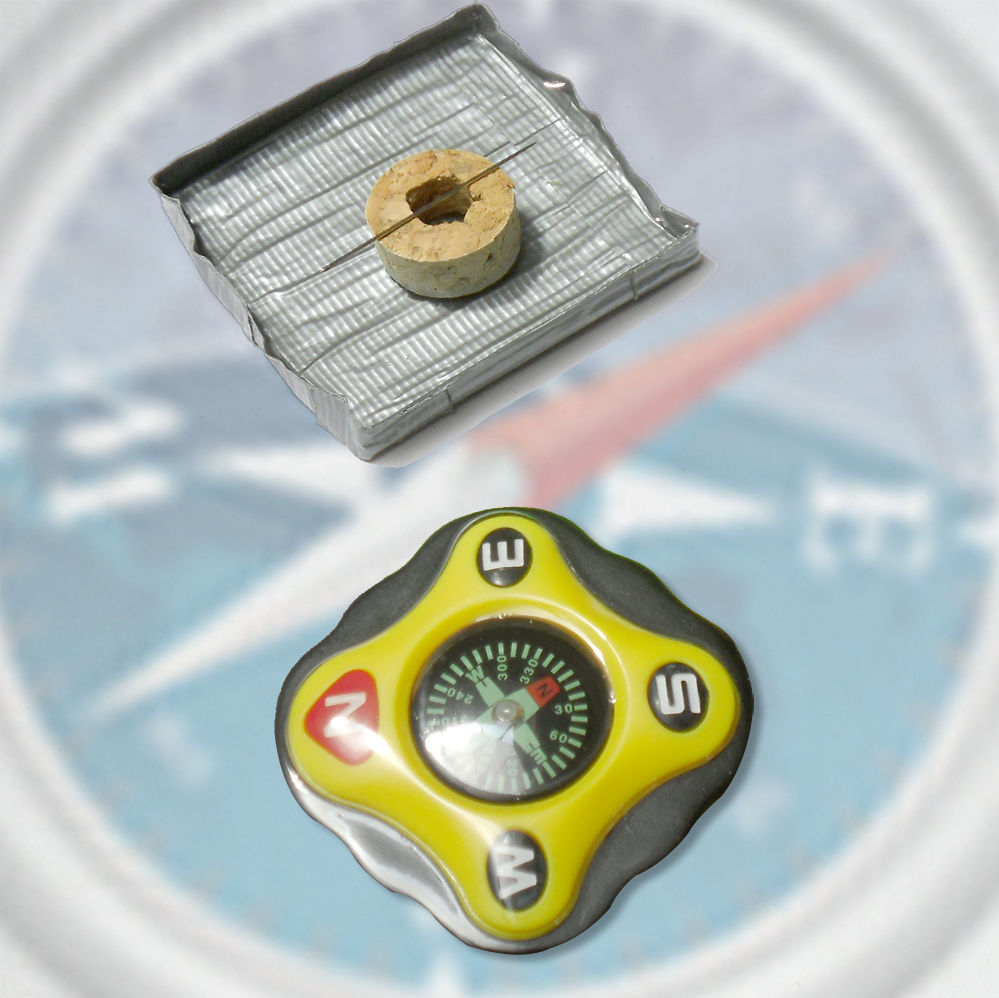
Next, bore a hole in the center of the cork, assuming that you’re using a piece from a wine bottle. Drill it out so the hole extends through the top and bottom of the cork. The width of the hole should be between ¼ and ½ inches. Cut the cork in circular sections that are ¼ to ½ inch thick as well. You will use this to float the needle over the water.
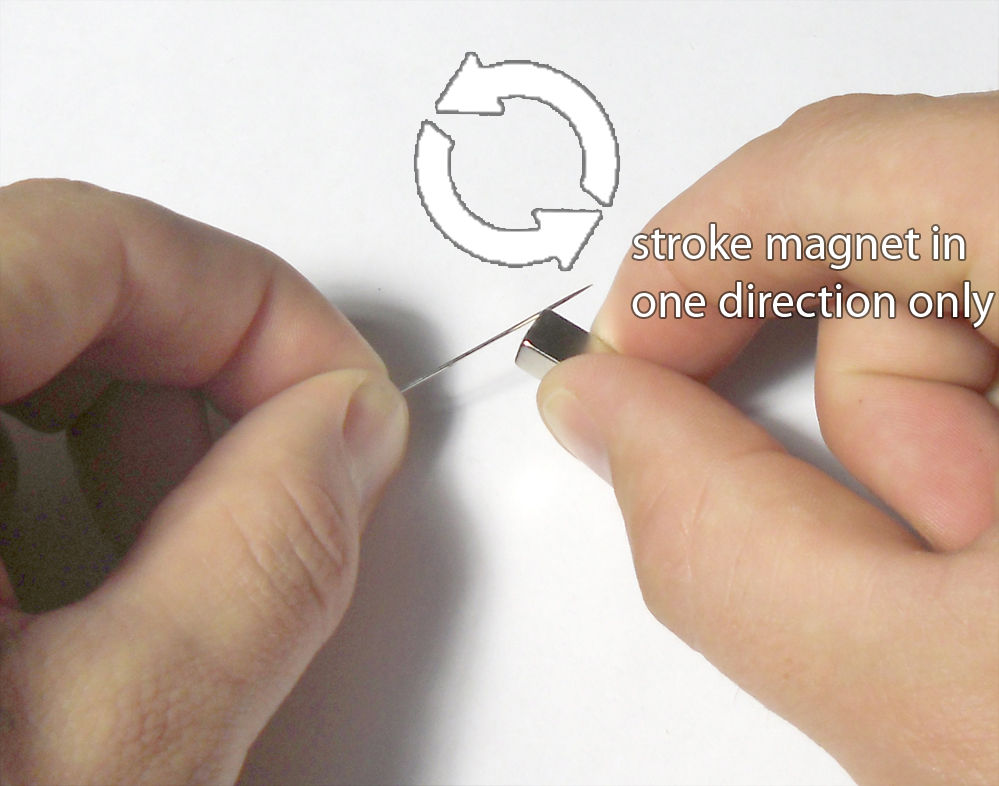
Finally, all you need to do is to magnetize the needle. Do this by choosing what end of the needle will be the top (north end) and bottom (south end). Make sure that you remember this as you start to run the magnet across the needle. You want to repeatedly sweep the magnet across the needle from the base to the top in the same direction for at least 30 swipes. It’s important that each sweep begins and ends in the north-facing direction. Do not sweep back and forth. Once you’ve completed one stroke, lift the magnet, and move it back to the starting position while holding it a few inches away from the needle. Keep repeating until the swipes have been completed.
All you need to do now is test the compass. Fill the tape bowl with a little bit of water and place the cork on top. Lay the needle down so that it’s centered over the circle in the middle. The north end of the needle will then face to magnetic north. If the needle isn’t as responsive as you would like, remove it, dry it off if necessary and do another 20-30 strokes with the magnet. Keep repeating until it is fully-magnetized.
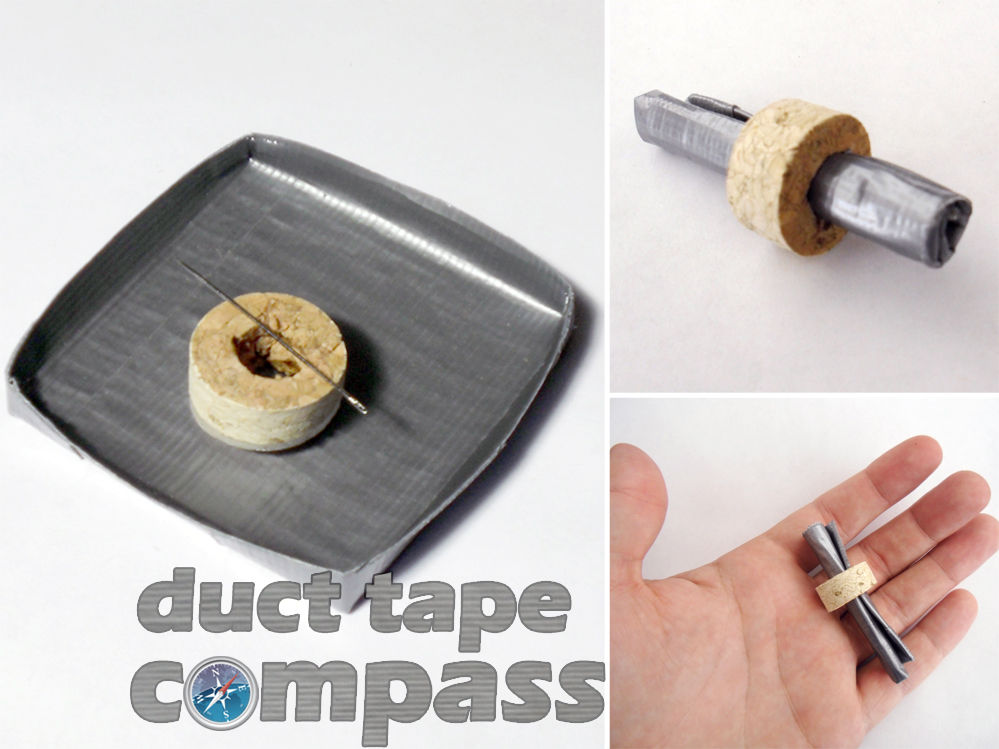
Once you’re done, fold up the boat in accordion-style strops and feed through the center of the cork. Place the needle through the cork parallel to the folded tape near to the edge of the circle. You now have a portable and durable compass that can be deployed anywhere.
Try it out for yourself, and consider using this project as a learning opportunity for your kids. Letting them build their own compasses is a simple and safe way to develop their bushcraft skills. Finally, consider including one of these compasses, or at least the core components for making one, in your bug out bag or survival kit. You never know when you will need it.