How to Make Corrugated Shingles from Aluminum Cans
If you are working on a semi-permanent structure and don’t want to use forest debris or other material for making the roof, you can turn empty beer or soda cans into shingles. The process is very easy, but producing the shingles is tedious and time-consuming. However, if you have the opportunity, this trick may be just what you need to create a sturdy roof that won’t require as much upkeep as less-durable options.
Required Items
A lot of aluminum cans
2 pieces of 1 x 6 hardwood
2 square metal rods that are a six inches long and around ¼ inch thick
Drill
Staple gun
Chisel
Square
Circular saw
Tin snips or scissors
Work Gloves
Preparing the Cans
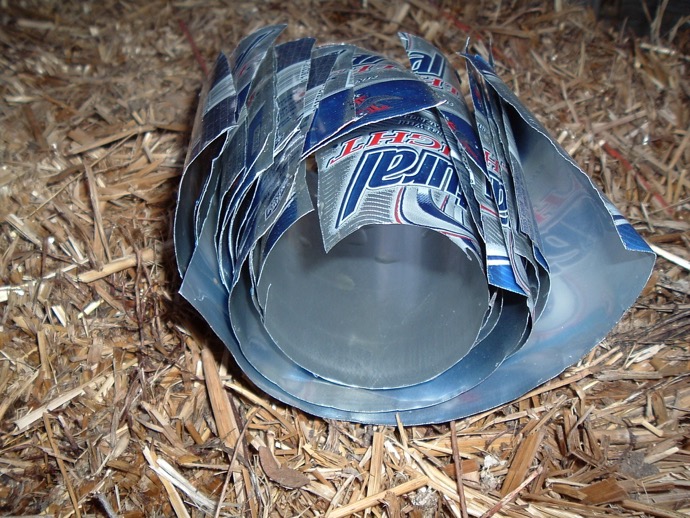
The first, and most tedious step is to prepare all of the cans. You want to make sure they are thoroughly rinsed and cleaned before starting this project. Take your tin snips or scissors and cut off the top of the can along the rim where it begins to taper off. Remove and discard the top piece. Cut a vertical line down to the bottom of the can, stopping just above where it tapers off. Make a horizontal cut along the bottom edge around the can until the bottom falls off and discard. Gently unfold the remaining piece of metal so it arcs and place it aside. Repeat for every can that you will need to complete your project.
Preparing the Die

The next step is to make the form that will be used to press the cans. Take your pencil and square and trace out two sets of lines about an inch apart in the center of each piece of wood. You want the lines to match the width of the metal rods. Make the lines lengthwise to the blocks of wood. Place the metal rods atop the lines on one of the blocks and secure by drilling holes into each one and hammering a nail through the wood. Make at least three holes along each rod for maximum stability.

The next step is to cut out grooves in the reciprocating piece of wood so that the metal rods will fit inside as the two pieces are pressed together. The grooves may need to be a hair wider than the metal rods in order to provide a flush fit. It’s very important that the notches are cut and chiseled into a square in order for the aluminum to have a good and consistent shape later. It’s also important that you position the grooves so they align with the rods when the blocks are pressed together.
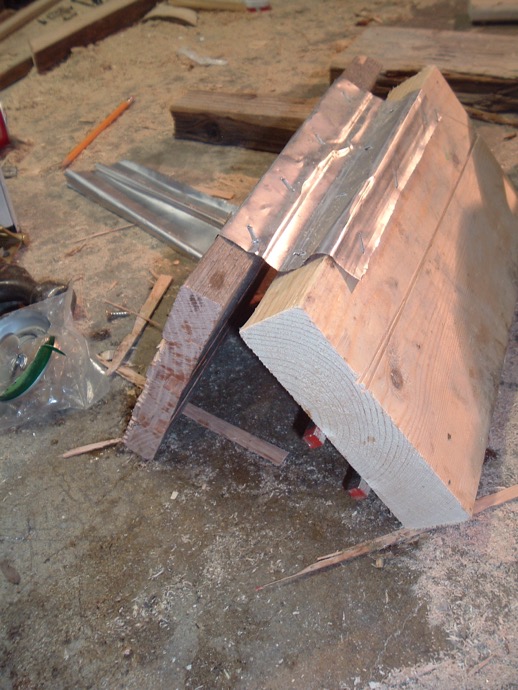
Next, you want to make a hinge to secure the pieces of wood together. Take one of the sheets of metal that you’ve fashioned earlier and place it against one of the long sides of each block of wood. You want to fold it so that the side of the aluminum forms a 90 degree angle around the bottom of one of the edges of each block as well as around the side. Do this for both blocks. Then, bend the metal down the middle so a crease is formed between each block of wood. Staple the metal to the blocks and check that everything is lined up properly. You should have a hinge that is butterflied and forms the blocks into a clam shell.
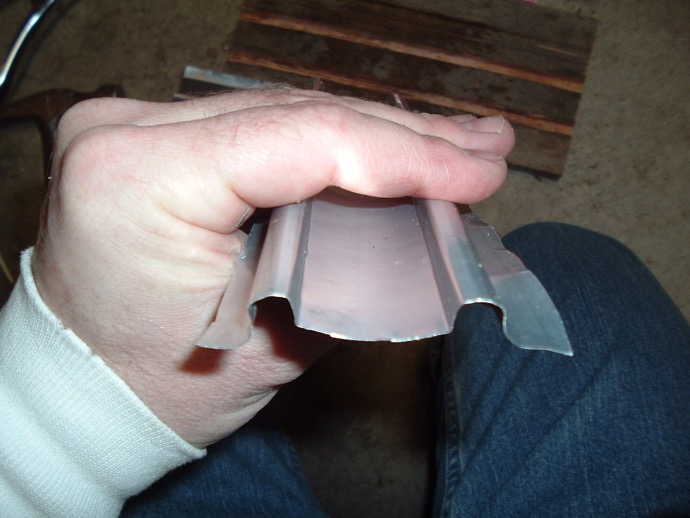
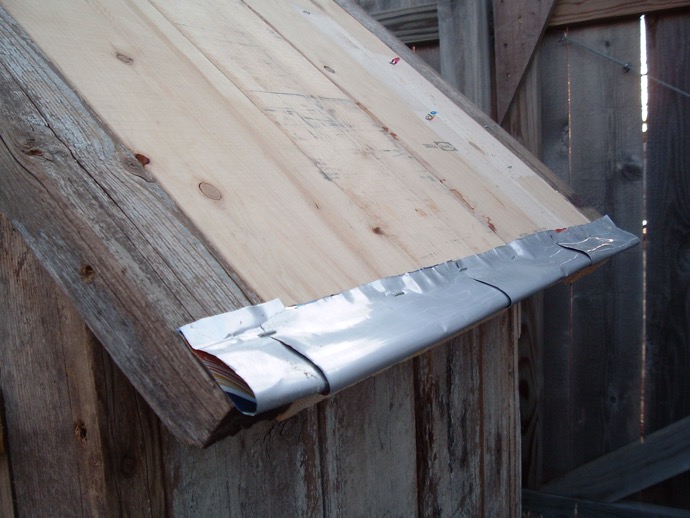
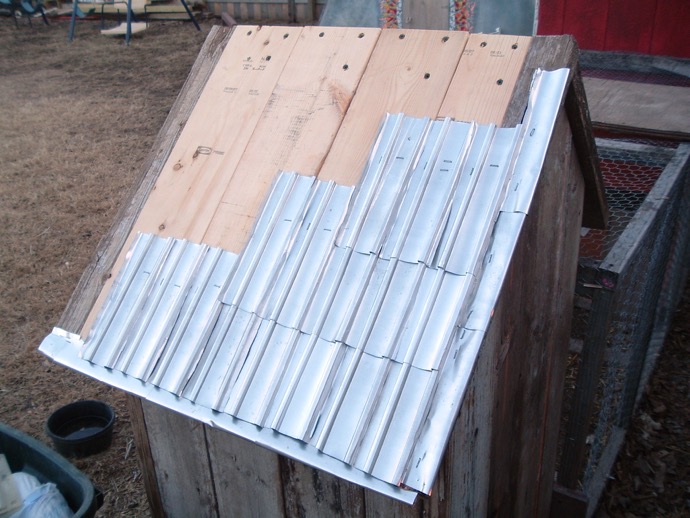
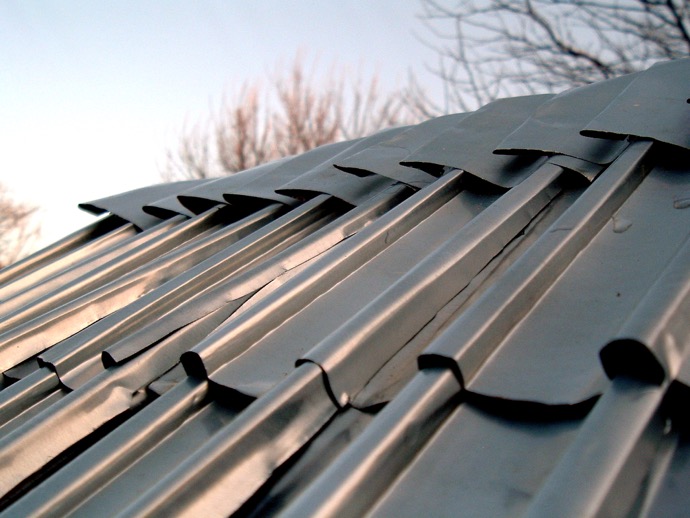
All you need to do now is trim the aluminum hinge and other components to minimize the chances of injury while using this press. When you want to use it, simply insert the aluminum sheets and press the blocks closed. Release, and you now have corrugated shingles. Keep in mind that you can scale up and use metal instead of wood for the press if you have the material available. In any case, this is a great way to recycle aluminum while also creating durable and easy-to-install shingles on any structure that needs a more permanent roofing option.