

Getting Started
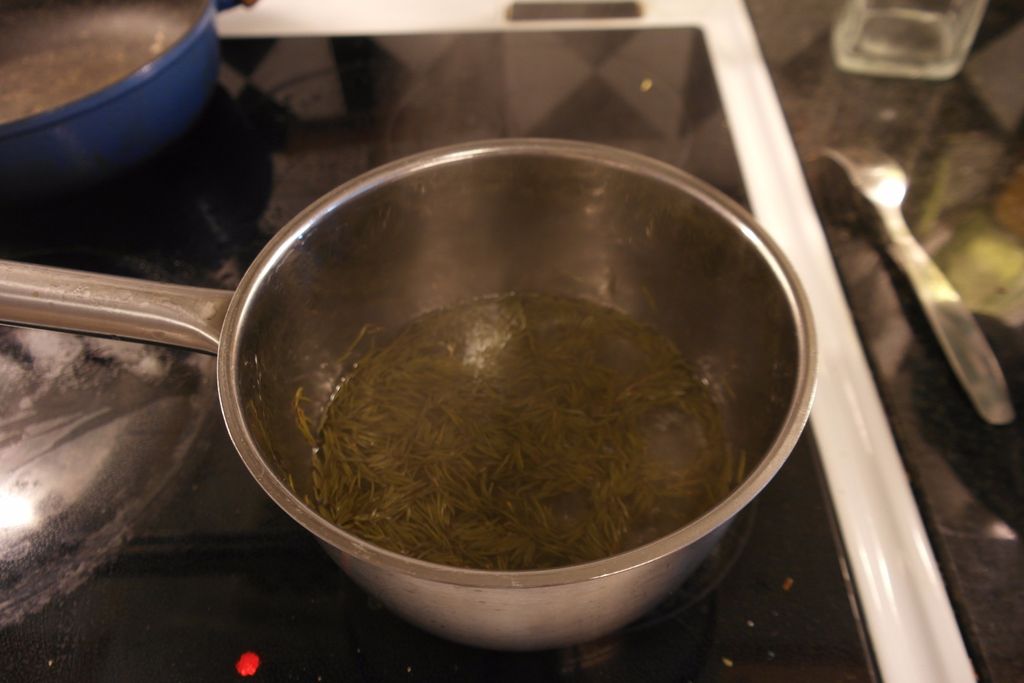
The first step is to add the needles to the saucepan, fill it with water and bring it to a low boil. It’s a good idea to give the needles a good dunk or rinse in some clean water beforehand. This will help to remove some excess debris and loose contaminants on the surface. You can also remove the needles from the branches or from each bunch, and this can help to conserve space and give you a more concentrated finished product. You can also just dump a whole bunch of branches into a larger pot of water if you have one available.
The trick is to use just enough water to cover the needles and allow them to slowly simmer or gently boil for at least a half hour. If you can compact the needles, you can use a 1:1 ratio of water and pine. If not, try to use just enough water to get the job done. You want a product that’s as concentrated as possible.
Processing the Syrup
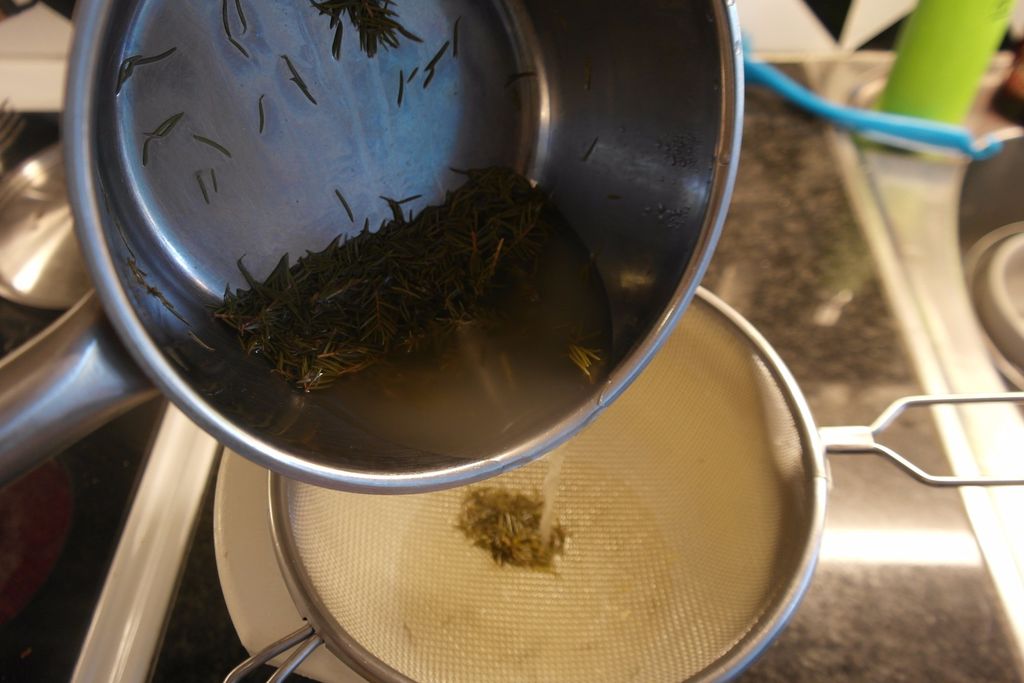
Once the needles have steeped, carefully pour the water through a strainer, screen or even some thin cloth. Repeat as necessary until you’ve removed as many particles and debris from the liquid. Discard the debris, needles and branches.
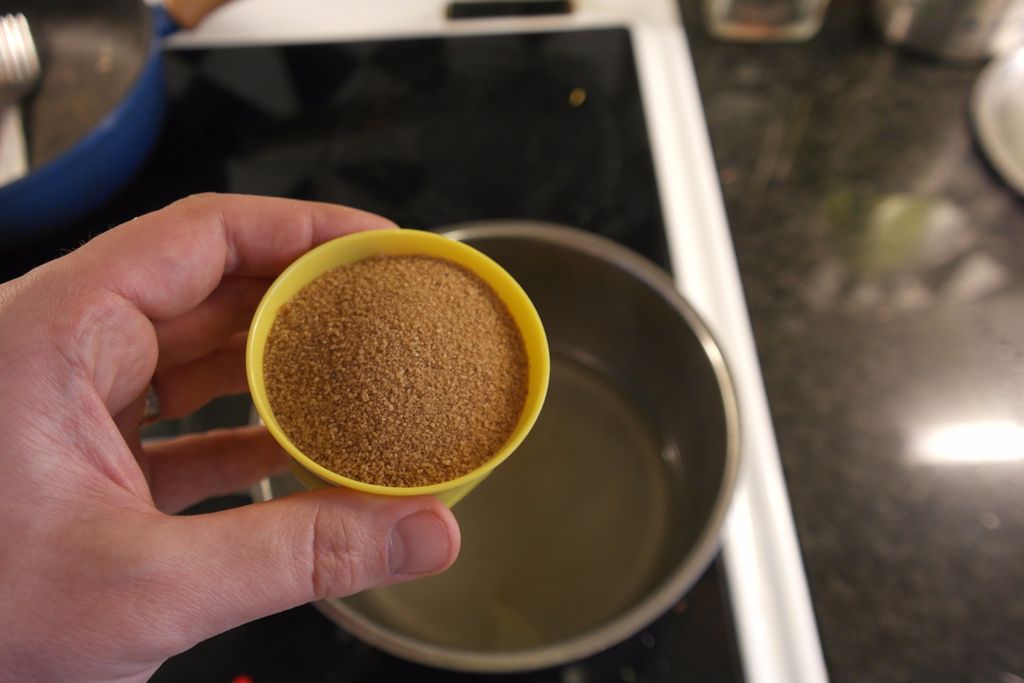
Add about a cup of sugar for every cup of water that remains. However, you can add more or less depending on your tastes and preferences. It’s important to note that the sugar also helps the syrup to thicken, so you may have to evaporate and process batches for longer periods of time if you keep sugar levels to a minimum. The finished product will also probably be more runny as well.
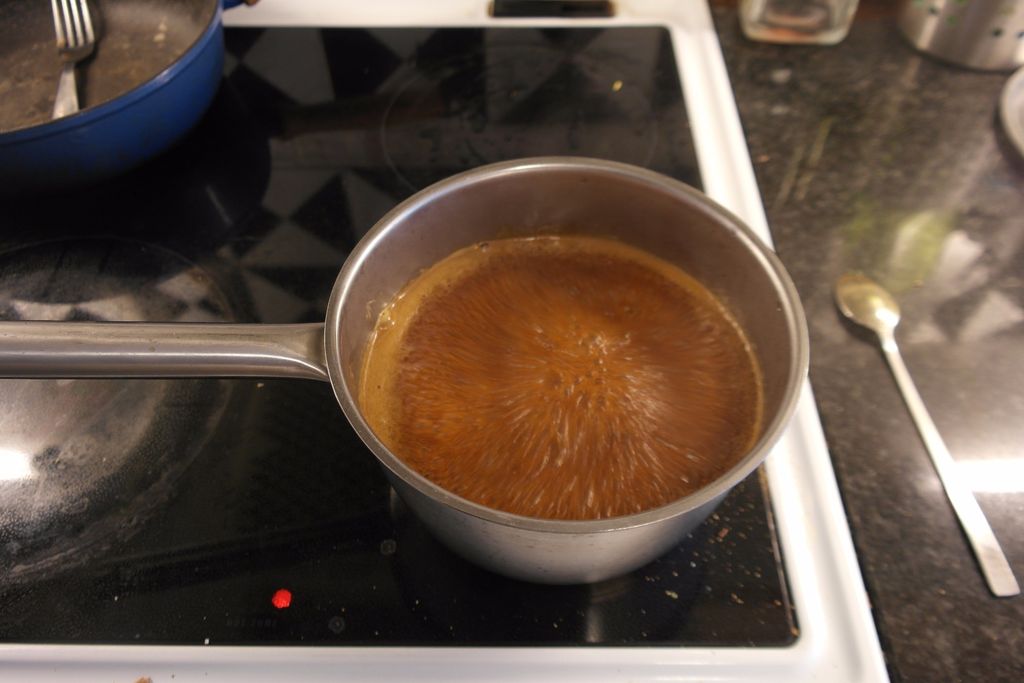
Bring the liquid and sugar back up to a medium boil. Stir frequently for about 15 minutes so the sugar can dissolve. Turn off the heat and continue to stir occasionally as the syrup cools. You will notice that it begins to thicken as it cools, but you won’t know how thick it will get until the syrup reaches room temperature. You may need to do some experimentation in order to get a sense of the proportions that give you the finished product you’re looking for.
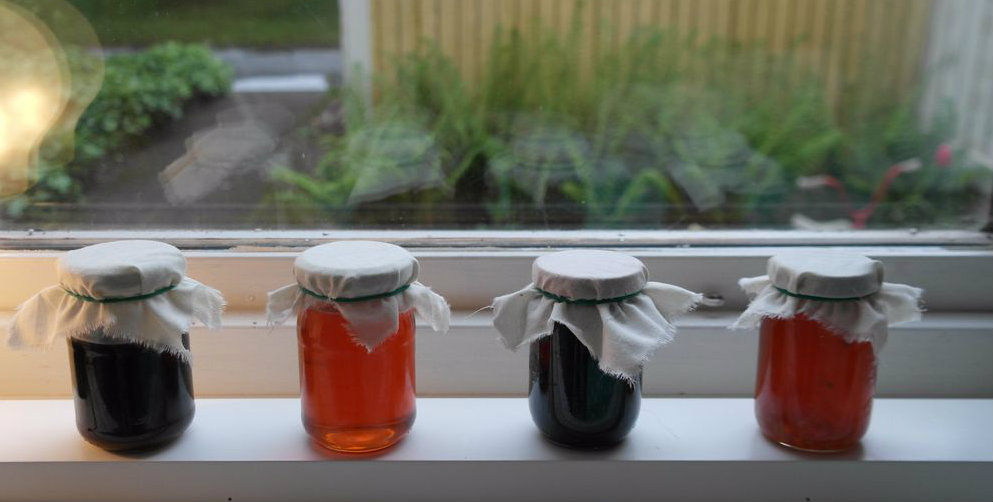
When you’re finished with the heating process, pour the syrup into your container and cover with a coffee filter or piece of cloth with a rubber band. This will allow the heat to escape from the jar while preventing insects from getting inside. Once cooled, you can begin to enjoy the syrup or attach a good, airtight lid and enjoy it later. Make small batches as they only have a shelf life of a couple of days unless refrigerated, but feel free to consider canning them for long-term storage as well.
Try making some pine syrup for yourself the next time you’re out in the woods with your family. This is a simple, fun and tasty way to illustrate how we can get so much of what we need from nature.


Pages:
- 1
- 2


