You can take advantage of all the resources that nature has to provide to make a sturdy, raised canopy bed in no time flat. All you need is some wood, cordage and an ax or saw and a survival knife. This will provide you with certain degree of shelter while also giving you a way to get a good night’s sleep without having to lay on the ground. Look at the steps below and discover how easy it is to get started, and this trick is ideal for anyone who will be spending more than a couple of days at a particular site.
Gathering and Preparing the Wood
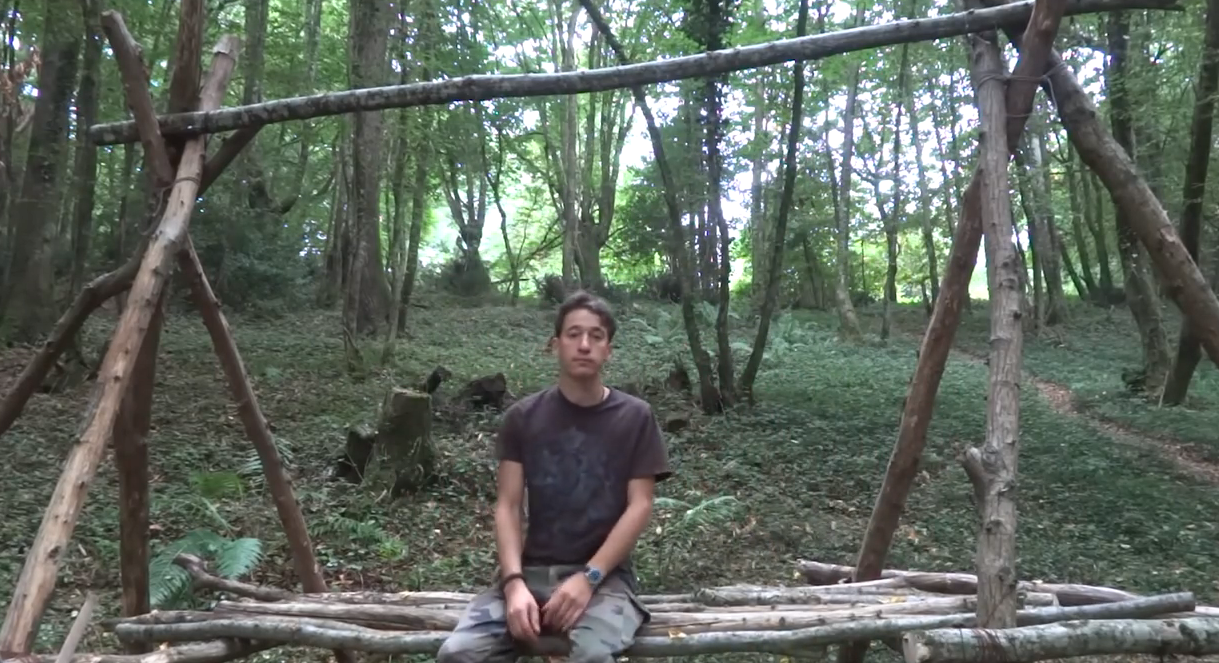
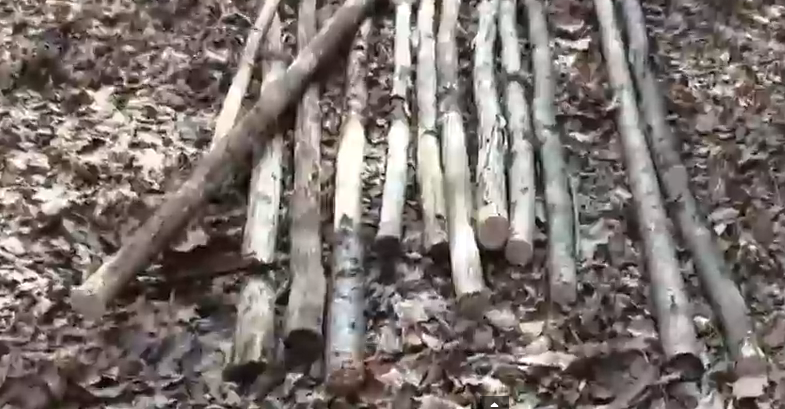
The first step is to gather enough wood to create the frame and bed. You want to get thick branches or thin logs that are around three inches in diameter at a minimum. This will provide the frame with enough structural integrity to support the weight of the bed as well as its occupants. You will need six branches that are between five and six feet long, three branches that are about seven to eight feet long and about 10 branches that are at least four feet in length for the base of your bed. However, you can adjust these according to your particular requirements.
Assembling the Frame
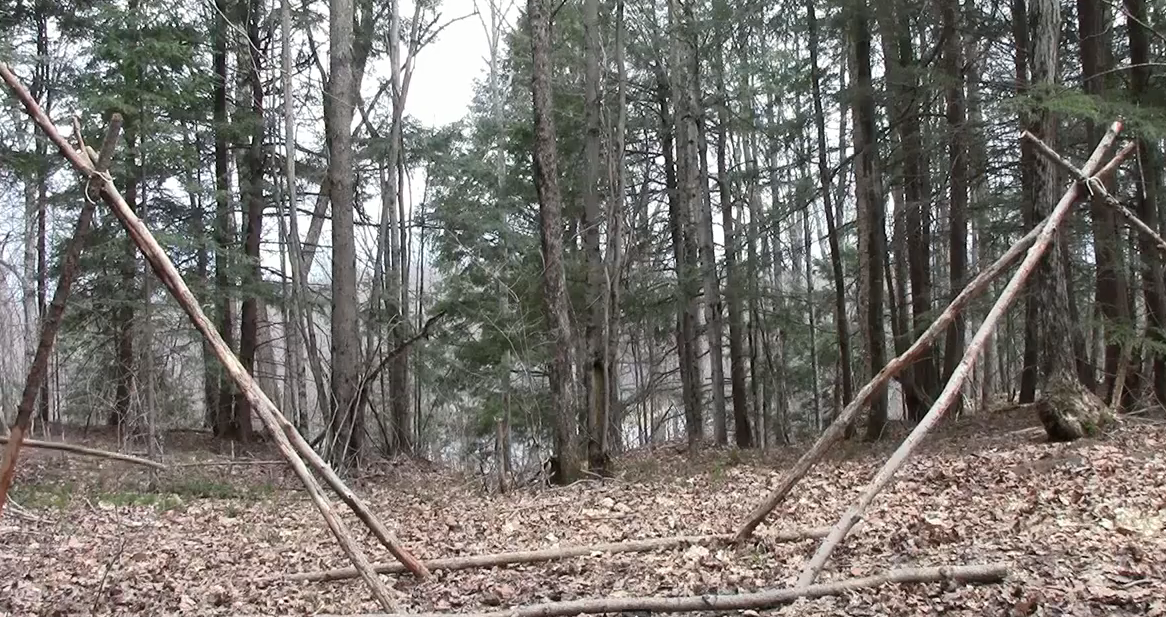
You want to create two “A” frames that have three branches each. Assemble them as you would when creating a tepee and secure the tops together with some cordage. However, instead of making a tripod, you will make a triangle that has one flat side and a branch that leans outward. This will give you structural support while the flat side will also allow you to build the bed frame later. Make sure that you space each “A” frame far enough apart to accommodate your height when you lay down, but close enough together so the branches that make the frame of the bed will reach both sides. You also want to cut a notch or groove in the back side of the front and rear legs of the frame to anchor some cordage that you will use for the frame later. Make sure to cut the grooves about six inches above the level that you want the frame to rest above the ground.
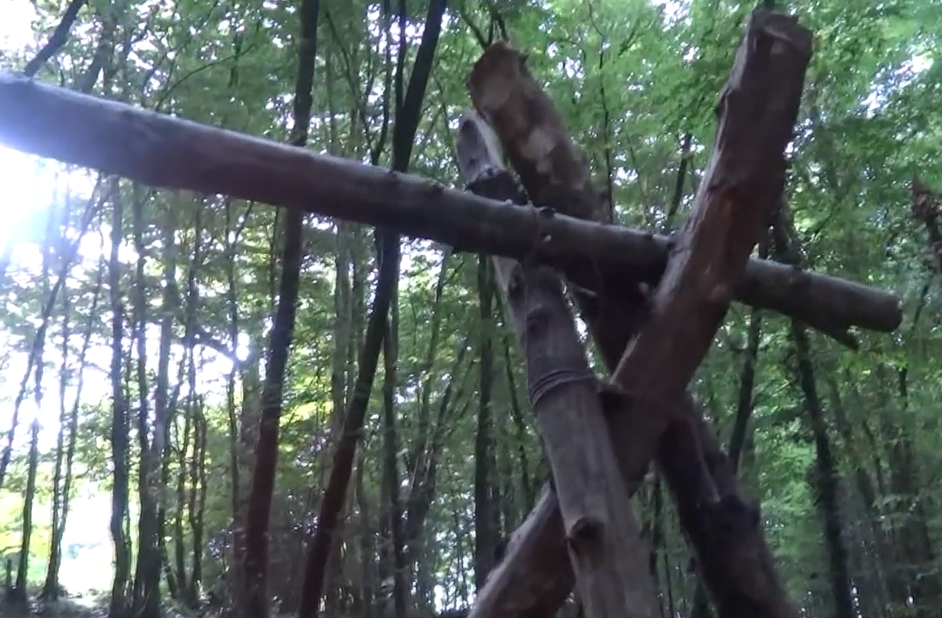
The next step is to attach cordage over the notches that you just made by creating two figure-eight loops. One loop will go around the notches and become secure as you pull down over the notched portion of the frames. The other loop will hold the branches that act as the frame for the bed. Insert the front and rear branches for the frame through the other respective loops. The finished product should rest about between six inches and a foot above the ground. You can make adjustments as necessary by cutting higher notches or using less cordage.
The next step is to place the shorter pieces of wood across the front and rear branches of the frame. Space them according to your needs, but remember that large gaps between the wood can lead to discomfort as you sleep. However, small gaps will require you to find and prepare more wood. Finally, add the remaining branch to the top of the “A” frame. This will serve as an anchor for the canopy that you will create later.
Bedding and Canopy
The next step is to find some soft pine branches that you can place over the bed for some cushioning. Spread them evenly across the bed, and you can add multiple layers if you prefer. You can also add some grass, mulch, moss or other material on top of the branches for some additional cushioning as well.
You have a couple of choices when it comes to building the canopy. You can drape a tarp or blanket over the branch and let it rest over the rear of your frame, or you can add some smaller branches across the rear of the frame and create a thatched roof with some branches. If you decide to build a a frame for the canopy, you can use thinner branches because the weight of the covering will be minimal. You can use cordage or take some strips of stringy bark or plant material to serve as the lashing that will hold the wood to the frame. It usually takes between three and four branches to provide enough structural support for the canopy while also serving as an anchor for the branches as well. Start layering branches from top to bottom, bending them around the branches of the frame. Repeat the process row by row until all of the gaps are filled and you have a thick and lush canopy. You can also place another branch or two in front to provide you with some additional protection.
This is an easy and effective way to make a sturdy bed when you don’t feel like making a tent or sleeping on the ground. However, it is crucial that you take measurements and cut the wood to their appropriate lengths in order to avoid wasting time or building a bed that is too small. Try it for yourself and see how you can use nearby resources to enhance your comfort while spending prolonged amounts of time out in the field.