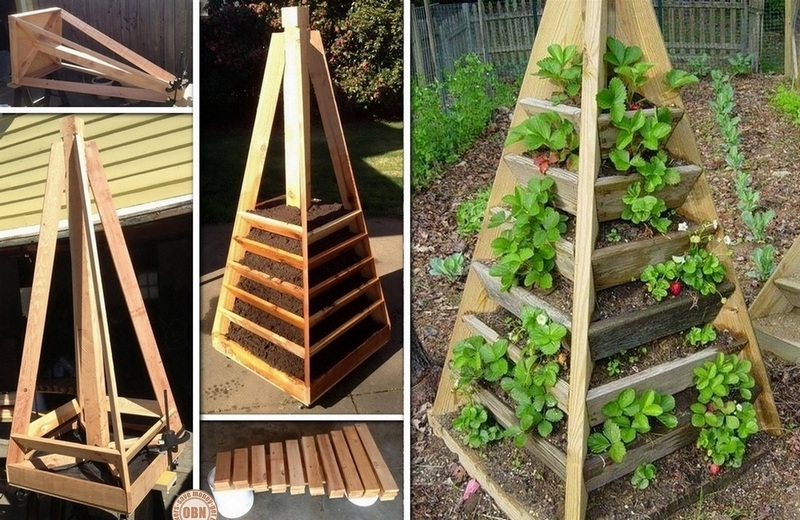
Building a garden pyramid is a fast and easy way to maximize crop yields, minimize space and reduce the amount of time necessary for maintaining the garden. The most basic form can be constructed using little more than some planks and nails, and the entire project can be completed in less than an hour. This is an ideal option for homesteaders as well as those who are preparing to fend for themselves during a survival situation. They work anywhere and can produce a lot of crops with minimal effort.
Calculating the Size of the Garden
The first step is to determine how big you want the pyramid to be. Remember that base needs to be big enough to support the first as well as subsequent layers of soil and gardening space. So, if you want to build a large, five layer pyramid, it will need to be wide enough to accommodate the sizes of the smaller layers on top. For example, if you build a 6×6 base, then the second layer will probably be 5×5, the third being 4×4 and so on. It is important to calculate this before construction so that you will end up with the space that you desire once the construction is complete.
Assembling the Boxes
There is no right or wrong way to go about building the garden boxes. Some people prefer to cut notches in the ends and slide the pieces together whereas others are happy to simply nail or secure them with screws and brackets. The most important thing to consider when assembling the boxes is to use wood that will give you the depth that you want for each layer.
For example, if you use 2×4 planks, then the boxes will only be 4 inches deep, in addition to the soil underneath each box. You can also use thicker pieces of wood on the first layer and add thinner planks as you work your way up. Finally, you need to decide if you will place the dirt and boxes directly on top of the layer beneath or create a notch system to affix each box to the one below. Using notches to lock the boxes in place will produce a sturdy box, but the extra wood will also reduce the amount of available growing space.
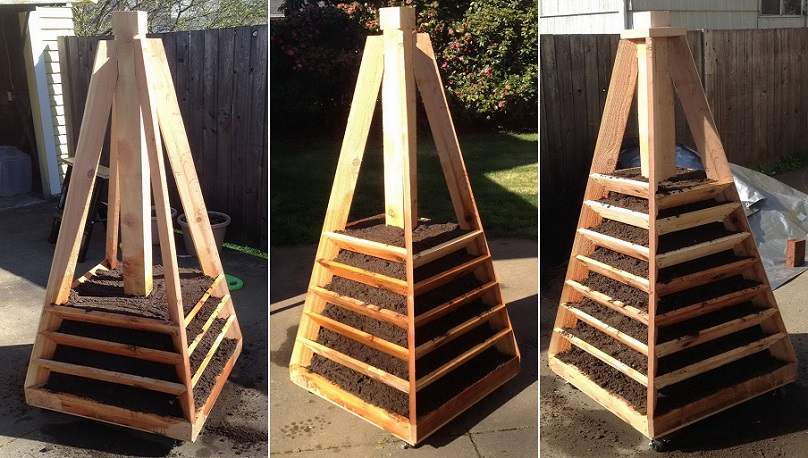
Creating the Layers
The easiest way to build the pyramid is to make the first layer, fill it with soil and place the smaller box in the center. Repeat until the pyramid is complete. Don’t worry about the box being a little uneven, and keep in mind that there will be a certain degree of sagging once the soil settles and the plants start to grow. The aim here is not to create the perfect garden box, rather an efficient way to grow crops. However, you can minimize the amount of shifting that will occur by compacting the soil prior to adding another layer. Just make sure that you don’t pack it so tight that the plants will have a difficult time growing.
Planting the Garden
Make sure that you are using the appropriate amount of space for the respective crops that you want to grow on each layer. Don’t overcrowd them, and make sure that there is enough soil beneath to accommodate their roots. Finally, choose crops that require similar amounts of water, and place the more thirsty varieties on the lower layers of the pyramid. This way, water will seep downwards and satisfy their requirements while not drowning the plants that are on top.
You will be amazed at how easy it will be to plant, maintain and harvest crops in the garden pyramid. You don’t need to dig trenches in the yard, weeds will hardly ever be a problem, and you can quickly turn soil and plant new crops after harvest. They can also be used indoors as well as inside of greenhouses as a fantastic way to maximize space and yields. Build one today and discover how this simple principle can improve your food security while minimizing the effort that it takes to maintain a garden.