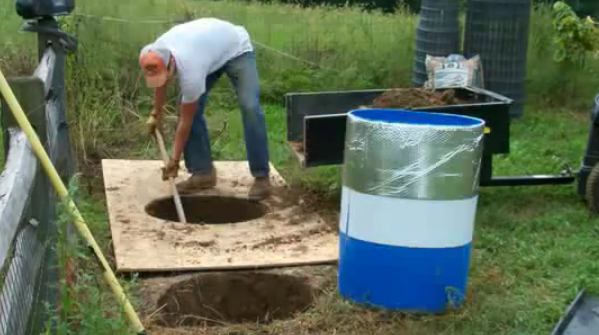
This is a project building small root cellars out of 55 gallon plastic drums patterned from the information in Purdue Extension Application note HO-125. This is my nephew Ben lending me a hand. It is January and they are working great. Additional info: you do have to put a drain hole in the bottom for condensate. Just pour some water in the bottom and drill a 1/2′ hole in the center of where ever the water pools. The lids are uninsulated and in Jan and Feb with nightly lows in the teens, the temperature inside was 34F. This was with 4″ of straw thatch and 18″ of course thatch, covered with a tarp. Note that 34 degrees is ideal for a lot of vegs like cabbage. However, potatoes and fruits like it around 40-45F. I would recommend additional insulation on the exposed barrel and also insulating the lid. Also fruits like it drier and right now the barrels are at 95% humidity because I didn’t put the heavy thatch on until later. I would recommend for fruits to thatch the barrels completely from the start so the temperature is does not go up slightly during the day – which causes it to breath in humid air at night when the barrel top cools. Over time this condenses driving the humidity up. Thanks, I have some pictures if that would help.
When I first bought my property, even before the house was livable, I knew I wanted a root cellar. The idea of using energy to cool food during the winter seemed crazy. But, with a small budget and not much time, I needed to focus my labor and resources on making my house livable for the winter. Yet I still wanted to put up something, at least some potatoes over the winter. So, instead of building a proper root cellar, I decided to do a miniature one. The trash can root cellar. Here is how it is done.

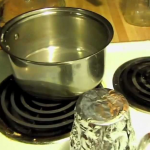
Start with a metal trash can with a tight-fitting lid. Dig a hole the diameter of the can and about as deep as the can is tall. Place some loose stones at the bottom of the hole (large enough to allow for drainage.) The can should sit with the top inch or so above the ground.
You will want to punch some holes in the bottom of the can to allow moisture to drain. You can use a drill, but I just drove a sixteen penny nail in with a hammer.
Put some straw in the bottom of the can and then layer in potatoes. Straw – potatoes – straw – potatoes. (Or other roots, but investigate crop compatability. Some foods store well but not with each other. For example, potatoes need cool, moist storage, whereas onions need cool, dry storage.
Store apples with potatoes and ruin them both.)
Then place the lid on the can snugly. Cover the can with straw. (I fill a couple of potato or onion sacks with straw for ease of removal and replacement.)


Then lay a sheet of plywood over the whole thing and weight with a large rock or brick. This will keep the raccoons from opening it up. And the steel can will keep burrowing critters from raiding your larder.
It is a simple matter to go out in the winter and brush off the snow, open the can and remove a week or so worth of spuds. In this manner I stored potatoes last October and ate the last ones in April.
I am still remodeling the inside of my house, so I haven’t built a proper root cellar yet. Before winter gets here, I may dig another hole and put in a can for carrots and beets.
I know many of you already have root cellars, but for those with limited resources, or those who are trying to homestead in suburbia, this is a workable solution.