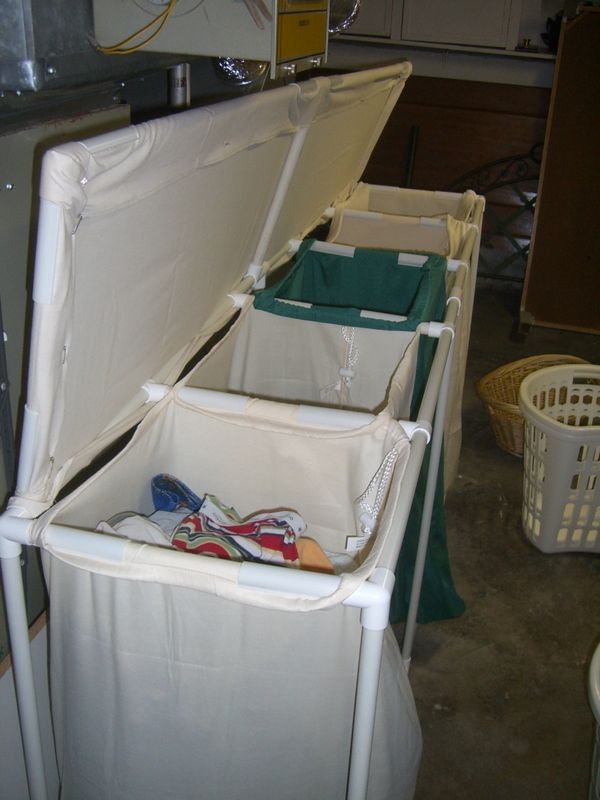
How to Use PVC to Make Hampers or Bins for Laundry

One of the best things that any one of us can do on the road to self-reliance is to find ways to be as organized as possible. It helps us to get tasks done faster and with less frustration, and being organized also helps to conserve time and resources. Laundry is going to be a big issue to contend with, especially if you have a large family, and using bins to keep things clean and organized is something that we should all think about. Let’s take a look at a simple project that you can follow in order to make your own customized bins out of PVC pipe and some ingenuity.
Required Materials:
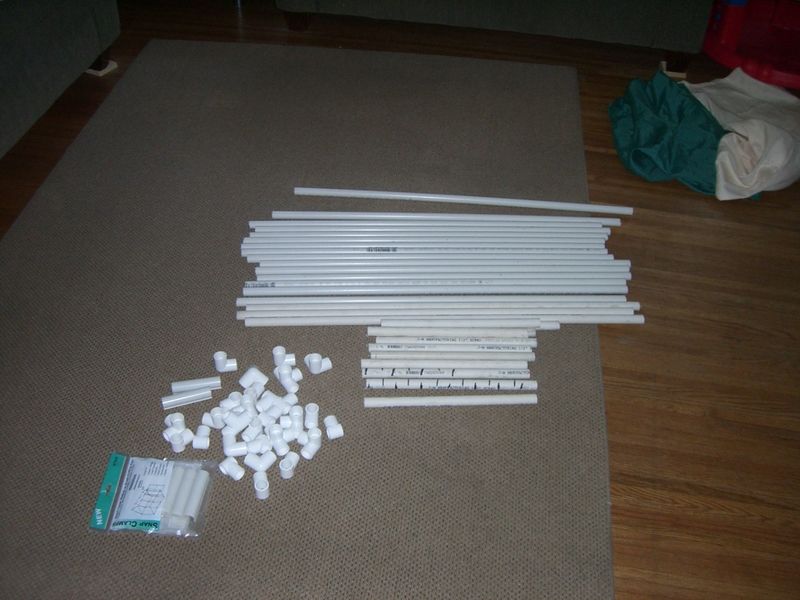
16 pieces of 3′ long PVC
11 pieces of 18” long PVC
8 Three way L joints for the corners
5 T joints
4 Elbow joints
11 Slip T joints
Epoxy or adhesive
5 laundry sacks (material of your choice)
1 piece of fabric for the cover
Getting Started
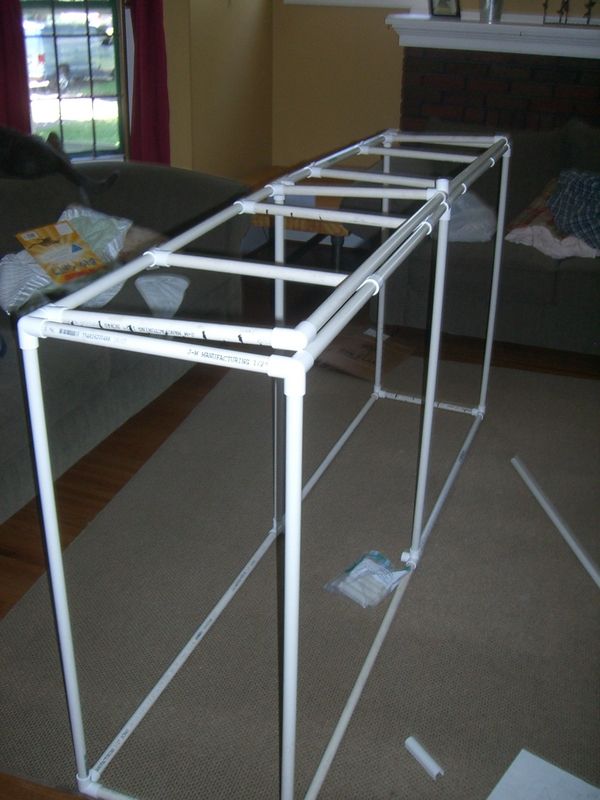
This project is for a frame that will support 5 bins. You can scale up or down as necessary based on your needs and available resources. You can also adjust the height and width of the frame in order to accommodate larger bins as well.
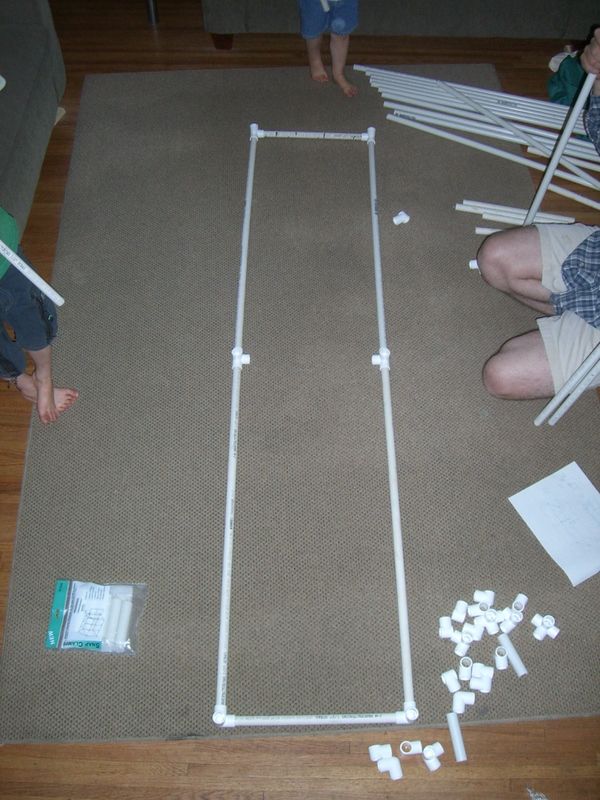
The first step is to prepare the frame,beginning with the head and foot. Take four 18” pieces of PVC and attach one Three way L clamp to each end. Make sure that the connector is facing up when they are attached. Next, attach one 3′ piece of PVC to each of the connectors that are facing up. Repeat the process for the other end. You should now have two rectangles.
The next step is to build the bottom portion of the frame. Simply take two pieces of the 3′ long pipe and attach each one to the connectors that will make up the bottom of the head and foot. Repeat for the other side and you should now have a six foot long frame that is bordered by two vertical rectangle ends. Next, we have to insert two T joints to connect each 3′ long segment on each side together. Make sure that the connectors are facing up and inward.
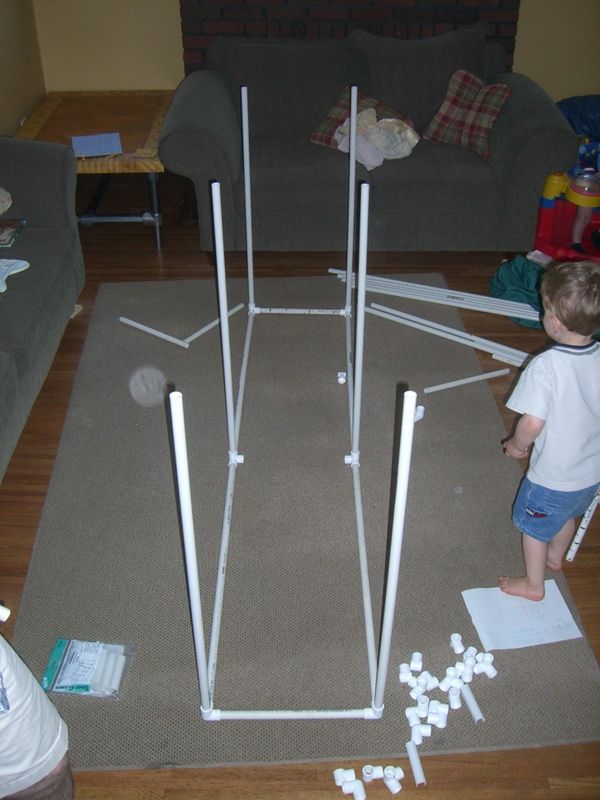
You can either attach the two 3′ long pieces of PVC that will make up the center support now or later. If you do it now, they may fall down or become askew. Don’t worry about it. It may be easier to attach the top of the frame with these pieces in place before hand. However, if you have someone helping you, you can also attach these pieces as you attach the top as well. The helper can hold the frame in the center and support it while you fit the connections.
Building the Top
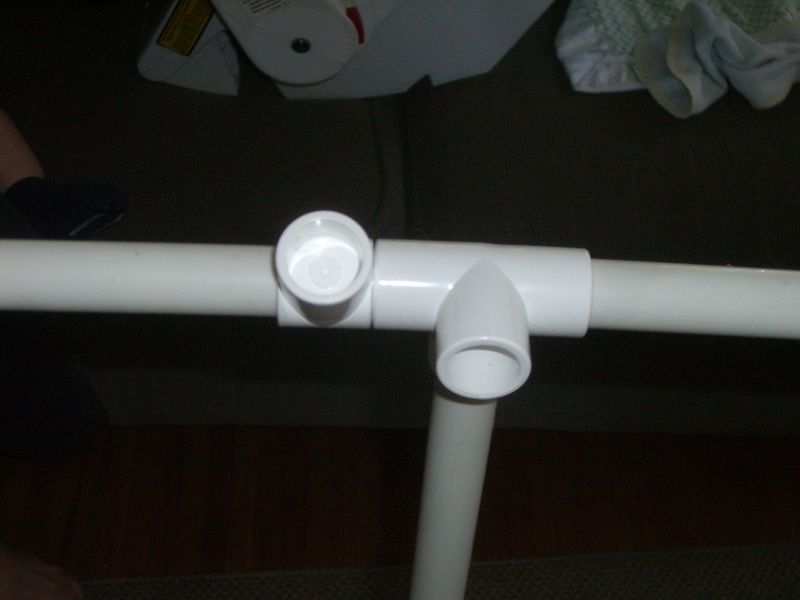
The top will also require four 3′ pieces of pie that are connected in the center, just like the bottom. However, you also need to attach eight Slip T clamps as well. Attach two on each 3′ long piece and temporarily center them. Slip one end of each piece into their respective corner connectors, and connect them in the middle as well. You should now have a complete frame, and all you will need to do is slide the pipe on top in order to adjust the size of each of your bins.
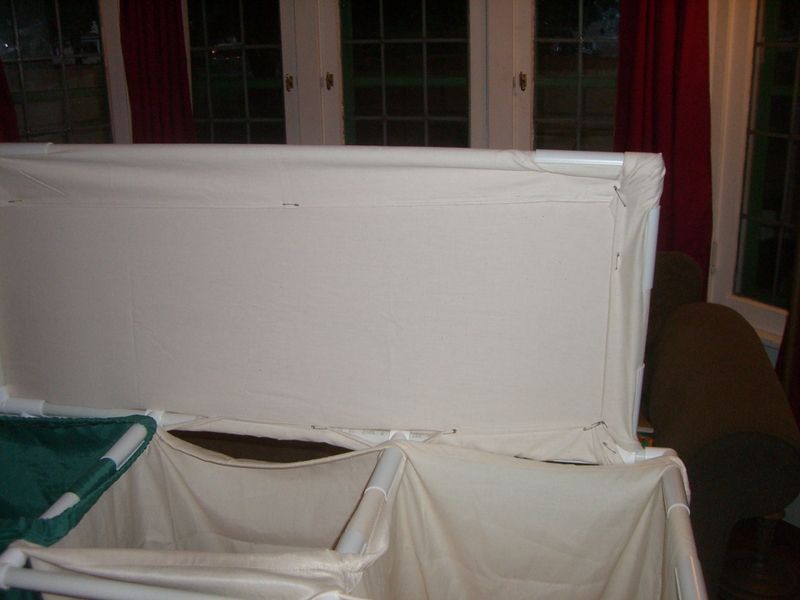
Building the Lid

Building your lid is optional, but it’s a good way to control odors and keep pets out of your laundry. To build the lid, all you need is to make another frame and attach some fabric. To make the frame, attach two elbow joints to two 18” pieces. Attach the four remaining 3′ long pieces to two Three way T joints before or after attaching the pipes to the ends.
All you need to do now is measure, cut and secure the material that you will use for the cover. You will also need to think about how to attach the sacks to every bin as well. You can use anything from cordage to plastic ties, curtain hooks to key rings. Use your imagination and find the easiest and most practical items to use.
Finally, this bin frame should be sturdy enough to stay together without the need for epoxy or adhesive. However, you can glue everything together if you are looking for a more permanent fixture. Just remember that you will have trouble dismantling it later if you need to bug out or relocate. Consider securing it in segments so that putting it back together will be fast and easy. This will also help to reduce the chances of losing parts along the way.
Try this out for yourself, and see how this simple project can make life a lot easier for you and your family. This is also a great one to use with your kids since there are not a lot of hazards to worry about as well. Remember that it’s important to be mindful of how you will manage everyday life as you adapt to a more self-sufficient lifestyle. Projects like this can really help you to keep moving in the right direction.