Heat or ice packs should be part of your basic collection of first aid supplies. You can either purchase commercial products or make your own with material that is usually readily-available. The important thing is to always have some on hand for when a strain, sprain or other injury occurs unexpectedly. Let’s look at a couple of ways to create your own if you don’t have access to store bought products at the moment.


Ice Packs
Ice Packs are very simple to make. All you need is water, some rubbing alcohol and a zip lock freezer bag. Mix three parts water to one part alcohol and pour into the bag until it is about 2/3 full. Remove as much air as possible, seal and place in the freezer for a few hours. The mixture will form into a slushy gel that will remain cold for a longer period of time than ice alone. You can also use a glob of hand sanitizer gel along with some water and achieve similar results. The only drawback to this option is that it only works when a freezer or some snow is nearby.

Heat Packs
One ingenious and time-honored trick is to take a sock and fill it with either uncooked oatmeal, rice, flax seed or even buckwheat. Try to use a sock large enough to hold four five cups of the filling of your choice. You can either tie off the top of the sock or sew it shut. Just make sure that you don’t use tape. It can produce toxins as the sock is being microwaved later. Consider sewing it shut because this will produce a longer-lasting seal and allow you to reuse this trick later if necessary.
Once the top of the sock has been sealed, place it in the microwave for three minutes. The dried food inside will heat up while the fabric will protect the skin from getting scorched. Apply the treatment in 10-15 minute intervals. Reheat as necessary and make sure that the skin is not showing signs of irritation or burning.
Muscle Rub
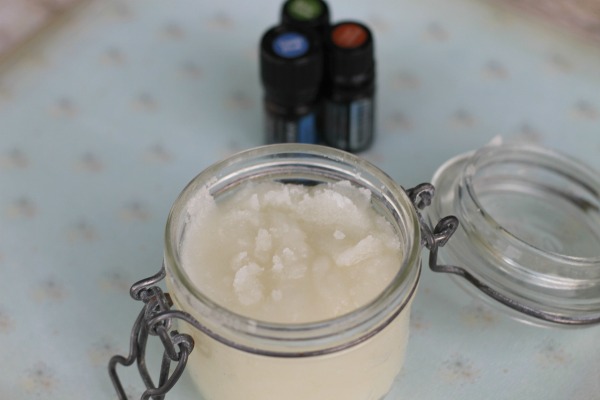
You can also make a batch of homemade muscle rub that will produce cool and hot sensations. This trick requires that you obtain a number of what’s called “essential oils” that are derived from certain plants. Here’s a basic recipe that you can improvise as necessary:
¼ cup of coconut oil
¼ cup of olive oil
1 tbsp of natural beeswax
¼ teaspoon of peppermint and eucalyptus essential oils.
¼ teaspoon of either ground or oil of ginger and cloves as well as black pepper.
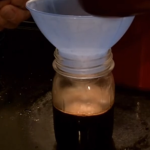
Make a double boiler and add the coconut and olive oil along with the ginger, black pepper and cloves. Let it simmer over low heat for about 15-20 minutes. Remove from heat and pour the mixture through a paper funnel or coffee filter into another cup or bowl. It may take a while for the oil to strain, but once it’s finished, add the eucalyptus and peppermint oils. Melt the beeswax and pour into the oil mixture. Stir so everything mixes evenly.
The mixture will firm up as it cools, but will take on the consistency of a gel or cream. If the finished product is too runny, consider melting and adding some more beeswax. If it is too firm, add some more oil. Experiment with specific proportions until it becomes just right. You can also adjust the portions of the oils and substitute the pepper for stronger varieties if necessary. Store the finished product in an airtight container and use when needed.
Try these ideas out for yourself and improvise in order to make them better. Keep a couple on hand for emergencies or to supplement some products that you already have in the home.