How to Dress and Prepare a Wild Duck

Cleaning a duck after it has been caught and killed is not a difficult process. However, it’s important to remember a few pointers in order to ensure the duck is safe to consume. Let’s take a look at the basic steps and you can become an expert in no time.
Temperature Matters
You want to get the duck into temperatures of below 40-50 degrees as soon as possible in order to preserve their meat and prevent bacterial growth. The good news is that if you have the ability to keep them cool immediately after the hunt, you can wait 3-5 days before doing anything. Many people suggest that aging the ducks for a couple of days will enhance the taste and quality of the meat as well. Otherwise, you will need to process and consume the meat as quickly as possible in order to avoid spoilage.
Cleaning the Duck
You want to wash and rinse the duck before doing anything else. There is a good chance that its body has been floating around putrid water, collecting dirt and debris from the ground or absorbing bacteria and other contaminants from the mouth of your dog. Make sure that you get into the feathers with clean water, give it a good cleaning and rinse thoroughly.
You also want to locate the area of the duck where the shot or arrow penetrated the skin. Mark it so you know where to check to remove pellets, fragments and trim the surrounding meat later. You want to get rid of the meat near the shot pellets as the metals will make this meat unappetizing. If practical, you can also remove the fragments at this time as long as you don’t have to process the entire duck on site, especially if you plan on curing it.
Hang the duck upside down by tying some string around its feet. This will allow the water to drain from the duck and speed up the drying process. However, if temperatures are higher than the 40-50 degree range, you will need to store the ducks in a bin of some sorts and keep them cool. Make sure there are holes in the container to promote air circulation and allow for evaporation.
To Pluck or not to Pluck

The next step is to decide whether or not you want to pluck the ducks. You can skin the duck in the field and get at the meat in a matter of seconds. However, many people prefer to pluck the feathers in order to keep the skin intact for better flavor. Another consideration is whether or not you caught the duck in salt water. Salt water ducks may have a fishy taste to them if the skin remains intact.
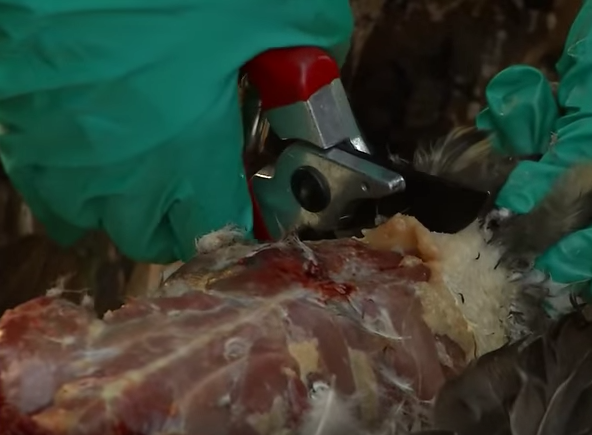
To skin the duck, the first step is to remove the feet, just below the fur line with a pair of snips or clippers. You can either keep or discard the feet, depending on whether or not you want to use them to make stock or enhance the flavor of your meal later on. The next step, if legal based on your circumstances, is to remove one or both of the wings.
Feel around for the joint that connects the wing to the body and break it with your clippers. You can also use your hands once you get some experience under your belt. The next step is to take your knife and cut along the skin that joins the wing to the body. Next, place the duck on its back on a hard surface and fell for the breast bone. Start peeling the skin open and back at the point where you feel the distinctive bump on the breast bone. You should be able to simple tear open the skin and reveal the meaty carcass underneath, and the skin should peel away from the legs and neck in a similar fashion.
To pluck the feathers, start by removing the feet and wings just like in the example above. Some people prefer to leave the feet on in order to have a place to grip the duck during the plucking process, so the choice is yours.
Start plucking by taking off the tail feathers and large feathers along the back and sides of the duck. Pull in the same direction that they are facing. This will minimize tearing of the skin and make the process easier. Feathers may be difficult to remove, and you may need to pull a small amount, or one, at a time until you get a feel for this process.
When you get to the smaller feathers on the underside of the duck, you want to do the opposite. Pull them off in the opposite direction that they are facing. Start at the tail end of the duck and work your way up. Keep in mind that you won’t be able to get all of the feathers off, and their will be a fluffy layer of down that needs to be removed. The easiest way to do this is to add some wax to a bucket of hot water, allow it to melt and then dunk the duck. Immediately remove the duck and place it in a bucket of cold water in order to harden the wax. Once the wax hardens, you can peel away the down and remaining feathers by going against the grain.
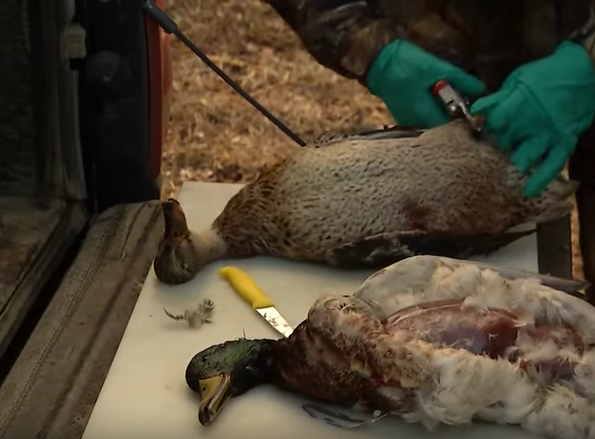
Processing the Carcass
The next step is to chop off the head or neck as well as removing the tail. There is a distinctive layer of fat that is located at the point where the tail meets the body. Cut off the tail just above this layer. The next step is to remove the entrails and internal organs. Place the duck on its back and make a cut that follows the rib cage, since there’s no meat there anyway. Continue to cut down and out until you remove the bottom portion of the duck.
You can then remove the entrails and trim as desired. You can also cut off the back end of the duck and pull out the entrails and gizzards in order to be able to stuff the duck as well. You also want to make sure that you remove the shot fragments and surrounding meat around the site that you marked earlier.
This is just a basic guideline that illustrates the general steps, but there’s plenty of room for improvisation. Try this out for yourself and learn about other methods that may work better for you. In both cases, make sure that you either eat or store the duck properly in order to ensure that the meat will remain as fresh as possible.