Basic Information About Water Bath Canning
Water bath canning is used to process recipes that contain acidic foods, including many fruits and vegetables. This method is normally used to produce a significant amount of food that will be included in any good stockpile, and it is also arguably the easiest to use. Let’s take a look at what water bath canning entails and how easy it is to get started on building your stockpile today.
Pot or Canner
All water bath canning really does is cook food that is already packaged in jars. This kills off bacteria while also creating a vacuum seal on the jars once they cool down. This minimizes the amount of oxygen inside and significantly extends the shelf life of processed foods. You can use one of many commercially-available products that are specifically designed for this purpose, or a big stockpot with a lid can get the job done just as well.
This means that you don’t need a lot of equipment to get started as long as you have some basic items. These include quality glass mason jars of different sizes, fresh lids and bands. You will also benefit from purchasing a jar lifter, which is essentially a special pair of tongs. You also need a rack for your stockpot in order to keep the jars from resting on the bottom as they are heated. Some people also like to have a rack for the counter so they can rest the processed jars on top as they cool instead of using a cloth.
Heating
Heat plays a big role in the canning process aside from being used to cook the food. It’s important to heat any mason jar before filling them in order to prevent them from cracking or shattering. It’s also important to sanitize all jars after use, and many people do it before using again as well.
To sanitize a jar, simply fill clean jars with water and place them in a large stockpot. Fill the stockpot up with enough water to cover the jars by at least an inch. Bring up the water to a simmer and start a timer for 10 minutes. Add one minute to the time for every thousand feet of elevation above sea level. Once finished, remove the jars, dump out the water and let them dry and cool to room temperature.
To heat the jars before canning, simply fill them halfway up with water and place them in a stockpot that’s also filled to the halfway level of the jars. Bring the temperature to just below a simmer and let the jars soak before filling. You can also use your dishwasher to warm the jars as well. Don’t remove the jars from the water until they are ready to be filled.
Lids and Bands
The lids should be flat and in near-perfect condition, and there is a special coating on the bottom that needs to be intact in order to adhere properly to the jars. If there are are signs of wear, deformity, scratches on the sealant or other obvious imperfections, you may need to replace the lid. Even if it does provide a vacuum seal now, it may fail later and cause stored food to spoil. The bands should also be in good condition, without being stripped or have gashes or buckles. A good lid assembly is essential, and you never want to take chances with using worn parts.
It’s also important to wipe down the rims of jars that you fill with a damp cloth or towel. Any remaining grime or food particles can interfere with the sealing process. Unclean rims can also cause bacteria to grow during storage. Finally, rims that are not clean may cause the lids to stick and be difficult, and sometimes impossible, to open later on.
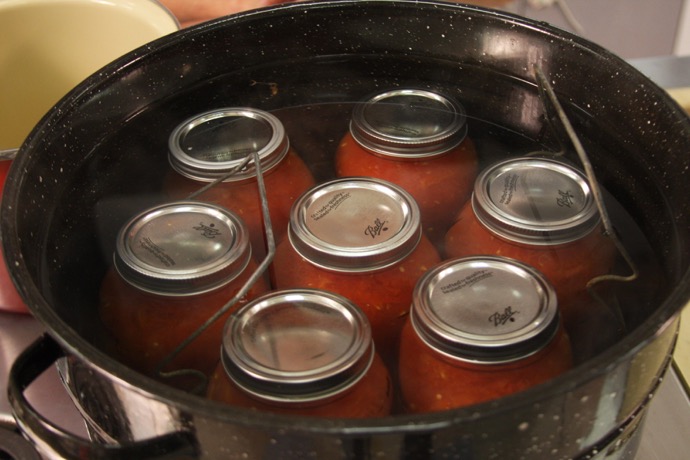
Once the jars have been filled and lids attached, place in the canner and process for the amount of time that is specified in the recipe. When finished, remove the jars and place them on a counter or hard surface and let them cool to room temperature. Once the food has cooled, now is the time to inspect the lids to ensure that there is a vacuum seal. If not, you can re-process the jars with a different lid assembly or eat the food instead of storing it. You never want to store jars with defective seals or the food will spoil.
That’s about it. All you need to do now is find some good and reliable recipes to work with. Most canning recipes are safe and include ingredients and processing times that can give you a healthy supply of food. However, some recipes may not be tested properly and can lead to problems later on. Due your due diligence, follow the basic steps above and get started with canning today. You will be amazed at how this process can dramatically enhance your food options when you need to rely on your stockpile.