How to Build a Rudimentary Day Time Signal Fire
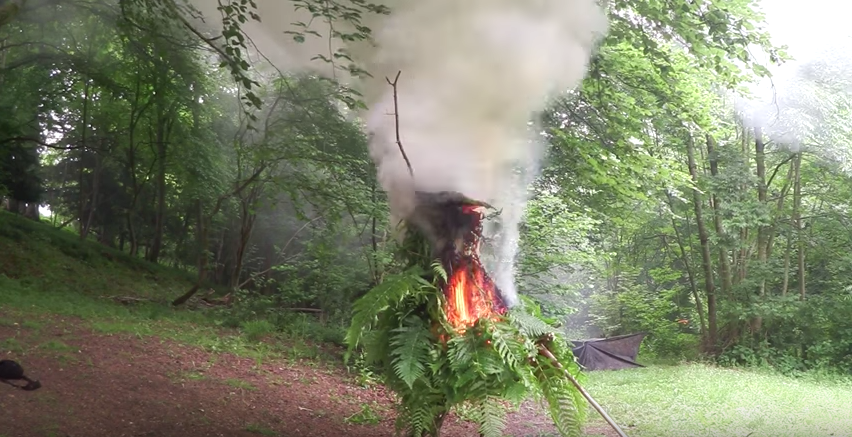
A good signal fire can be seen for miles in some cases, especially if someone from the air notices the smoke and flame. Building one can help you to attract attention when you want it, but it’s important to make it as effective as possible. Take a look at the following example of a rudimentary fire and see how easy it is to build one that is tailored to be as effective in the day time as possible.
Getting Started
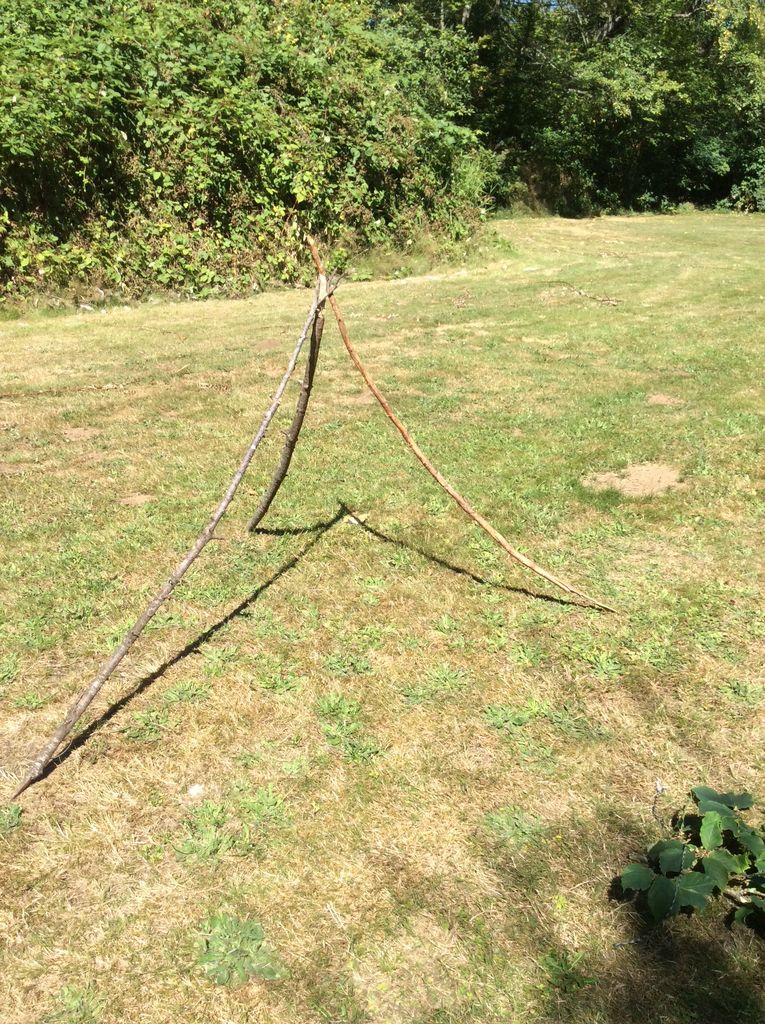
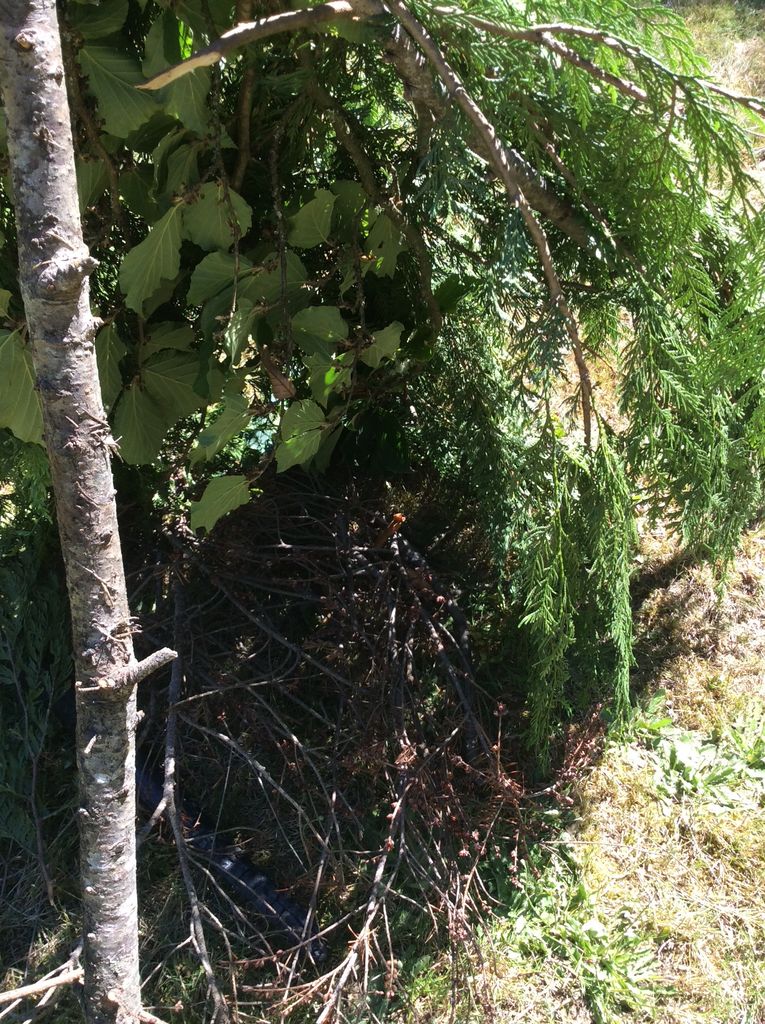
The first step is to build a tepee frame that is around two to three feet high. Choose branches that are between ½ and an inch thick so they will have the strength to support the fire as it smolders. Try to find branches from the ground that are still moist or relatively-fresh. This will protect them from being consumed as the fire burns, and this can significantly increase the burn time of the signal fire. Place the branches in tripod form and secure them at the top with some cordage.
Tinder and Fuel
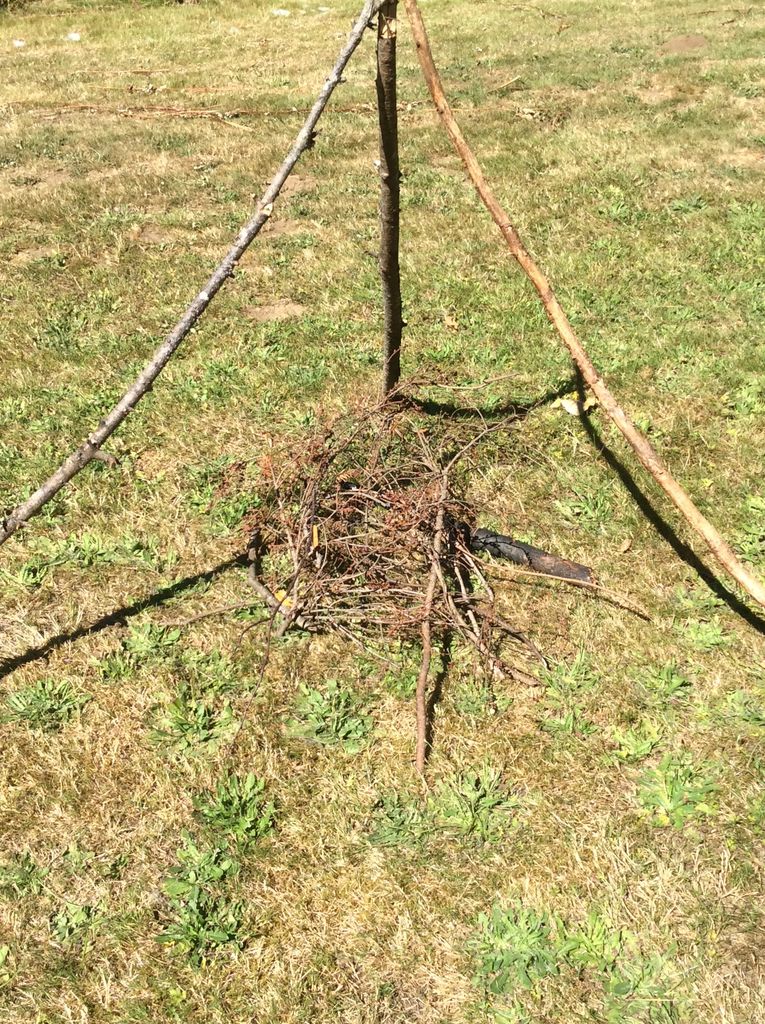
You want some good tinder that is dry and easy to ignite. You can use a mixture of different things from dried pine cones to twigs, moss, mulch or other forest debris. Gather some kindling that consists of small to medium-sized dried twigs and branches. Whenever possible, use branches that have pine needles or leaves on them. This will cause them to burn more slowly and produce more smoke than cleaned branches.
Remember that there is a difference between a signal fire and a regular one. The object of this fire is to produce a lot of smoke as opposed to flame. This is why using kindling that is loaded with leaves and pine needles is so important. You won’t be using large pieces of wood like you would for a normal fire, rather this fire will be maintained by adding more small branches with partially-dry to dry-ish foliage. You should also stuff the fire with leaves, moss, bark, mulch, pine needles, grasses and other debris that will smolder as it burns.
Fill the tepee no more than a third of the way up with this material. Make the main mound of fuel in the center, extending outward until the material is at least three inches from the tepee frame. We don’t want to create a large fire that can consume the whole tepee, and it’s important to protect the base from catching fire as well. Make sure to have extra supplies of fuel that you can add periodically to maintain a good, smoky and smoldering fire.
Covering the Fire
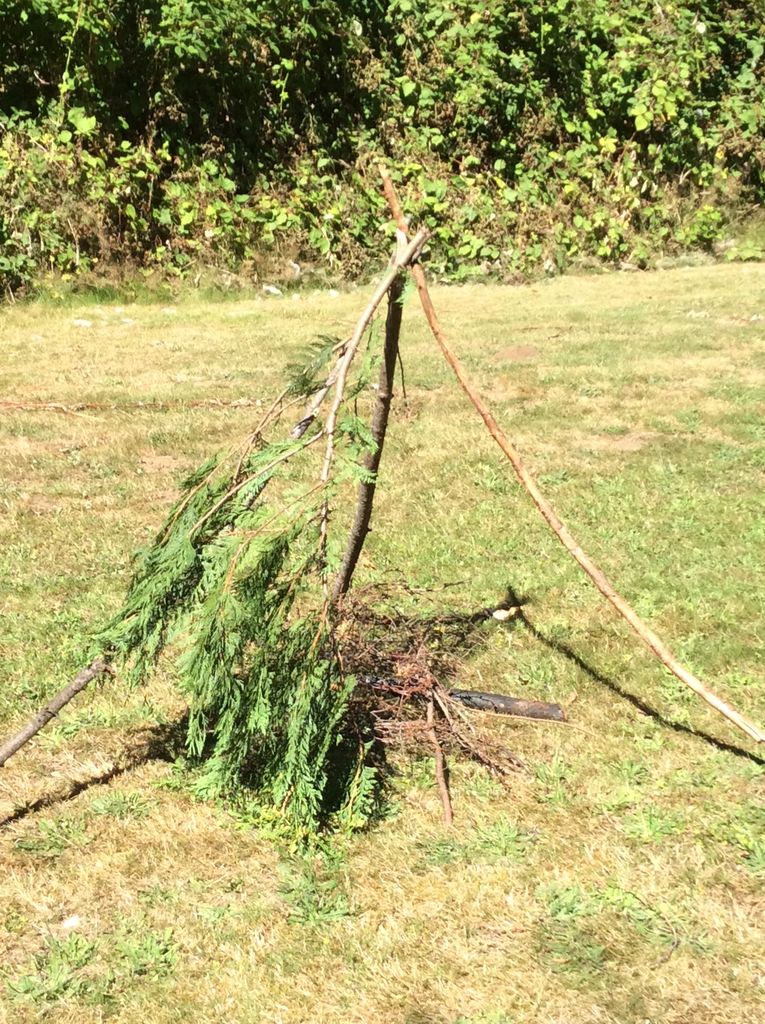
The next step is to place some light branches that are full of pine needles atop the frame. The denser the pine needles are on each branch the better. You can also use a mixture of pine or leafy branches as well. There are differing opinions as to the best way to layer the branches, and you can experiment with different variations as you practice. One suggestion is to place the first layer of branches upside down and tie off the stumps at the top of the tepee with some paracord. Others suggest that you cut off the stumps and place the branches facing up directly on the ground.

The important thing is that you secure the branches so that the tepee is covered with leaves and pine needles. However, you also want to create some small spaces in order to allow air into the fire, and you can regulate the rate in which the fire burns or smolders by adding or removing branches. You also want some space that’s easily-accessible along the bottom in order to ignite the fire and keep adding fuel as necessary.
Remember that the goal is to build a smoldering, smoky fire that will burn for a long time and be visible during the day. You also want to consider where you are placing the fire in order to obtain maximum visibility and have the best chance of attracting attention. It will take some experimentation before you get a sense of how to build and maintain the ideal fire. However, this is one skill that you definitely want to develop before you’re thrust into an emergency survival situation.