

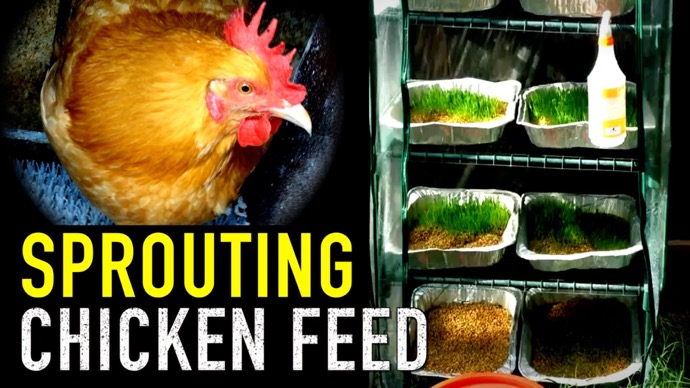
How to Grow Your Own Supplement Chicken Feed
Anyone who has raised chickens knows how good, quality feed can quickly add up. Fortunately, chickens are opportunistic eaters who can often forage for themselves if they are given the opportunity. Despite this, it’s important that you supplement their diet with essential nutrients that may or may not be available in your garden or property. One of the easiest ways to do this is to grow your own. Let’s take a look at a simple system that can give your chickens a virtually-limitless supply of dietary supplements.
Main Components
All you need is some shelving along with either plastic or aluminum containers. Disposable baking pans, such as those you use for turkeys or 3-4 inch deep plastic storage containers should do the trick. The aim is to fill these containers with potting soil, some nutrients and compost, plant seeds from foods that are nutritious and enjoyed by most chickens, and let them sprout.
Seeds to Consider
The best items to consider for homegrown chicken feed are ones that sprout quickly, grow in large quantities and don’t need a lot of effort to maintain and harvest. A few examples are bean sprouts, peas, runner beans, barley and other grains that turn into grasses as they sprout. Corn, cabbage, kale and various legumes are also excellent choices, and chickens love them.
Planting the Seeds
Plant the seeds as you normally would, in good, quality soil and keep in a place where they can receive adequate sunlight. The beauty of this system is that you can grow sprouts year-round, indoors, as long as the planters can be located near a sunny window. You can also grow them outdoors during the summer months as well. The size of your system and amount of feed that you can produce is completely dependent on how much space and containers you have on hand. Try to build or obtain a shelving unit that will allow you to place at least three containers on each shelf in order to maximize space.
Growing the Seeds
Follow general guidelines for each seed crop that you are trying to grow. Some require more water, more time and more nutrients than others. Other varieties can be grown in less-favorable conditions with minimal resources. Organize your seeds so that they are grouped together and start a crop rotation by staggering what you grow when. This will allow you to continually access a fresh batch of sprouts once you pull the ones that are ready now.
Some general things to consider, especially with grains, is that you should treat them before planting. Allow them to soak overnight in water to kick-start the growing process, and consider adding a cap of bleach to the mix. This will help to prevent the formation of mold, which is going to be your primary concern, aside from pests as you grow your own feed. A little bit of bleach will be harmless to the chickens, and shouldn’t interfere with the sprouting of the seeds. However, if you are concerned, skip this step and just make sure that you keep your planters in a well-ventilated area and that you include enough drainage holes to prevent water from pooling on the bottom.
You may also want to consider arranging your containers so water that drips from the bottom will drain into the ones beneath. This will help to conserve water while helping to keep crops below moist. It will also create a more low-maintenance and forgiving system in case you forget to water the seeds from time to time.
You should see most seed varieties start to sprout within a couple of days. Many will be ready for harvest in as little as a week. This is especially true for sprouts. However, you want to make sure that you are following guidelines based on the particular species that you are growing. You don’t always need to grow plants to their full, harvest level of maturity, but you want them to grow enough to contain the nutrients that your chickens will need.
Finally, remember that this is just a supplement to the diet of your chickens. You should still include different ingredients that range from kitchen scraps to seeds. Corn also takes longer to germinate and sprout, so be prepared to wait extra time for your initial harvest and develop your rotation system accordingly.
All in all, it may take a little bit of time and practice to get your chicken feed system up and running. However, once you do, you will be amazed at how much you can produce in a small space with minimal resources. All of this can translate into having access to a steady food supply for your chickens while reducing cost as well as the dependence on commercial products that may not be available during a SHTF or prolonged survival situation.
More Articles From This SIte
 Growing Your Own Antibiotic Bandages
 Crying Wolf and Threats to Our Security
 Why Nuclear Ballistic Missiles Are Still a Threat
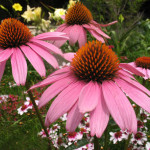 Lakota plant medicine, Purple cone flower/Ecinacia tea for boosting the immune system
 The Top 3 Tips for Surviving Dangerous Weather!
 The Crazy Things that People do and Your Security


