How to Make Matches That Can Strike Anywhere

Matches are a fundamental component of any survival kit, and it’s important that they can be lit when needed. Unfortunately, strike pads on the sides of matchboxes can become wet or worn after only a few uses. Let’s look at a way to re-process matches, so they can be struck against a wide-range of surfaces in order to ignite out in the field.
Required Items:
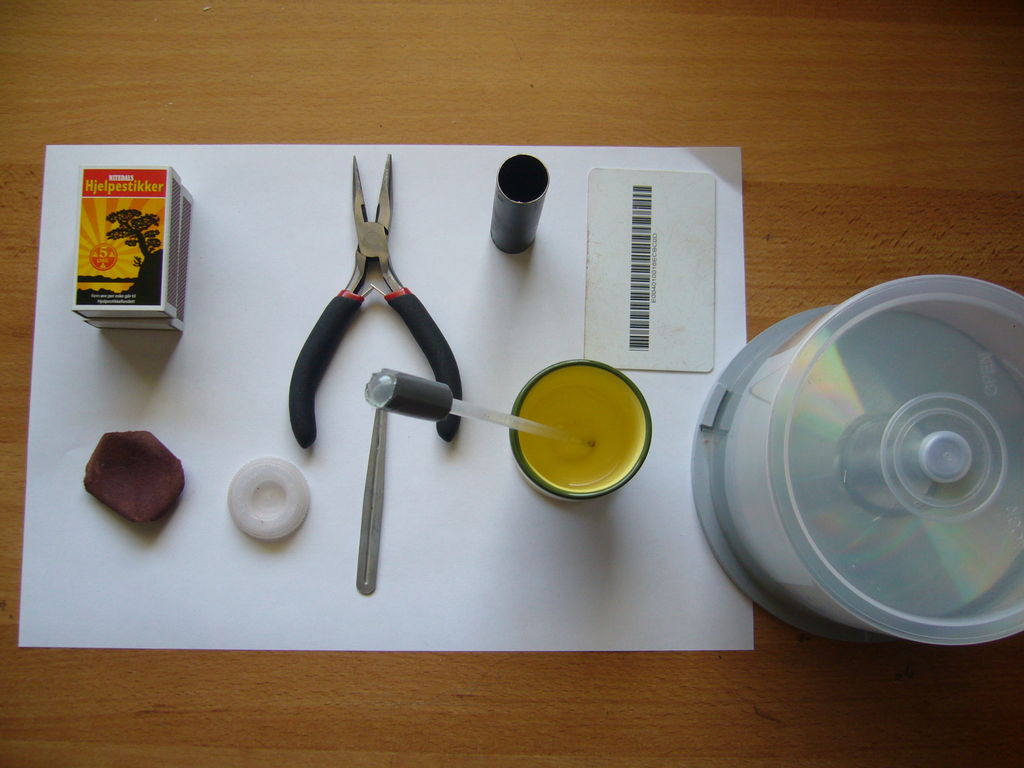
Wooden matches
Sand paper
Small container
CD tower case
D battery or some kind of heavy cylinder
Water
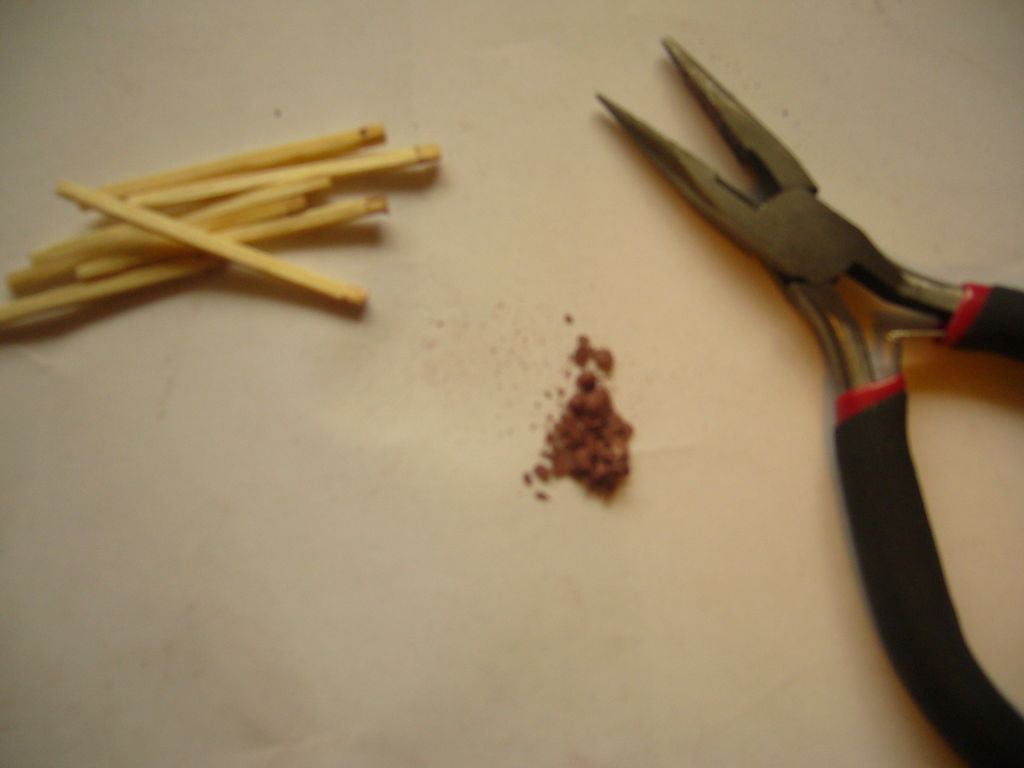
Pliers
Getting Started

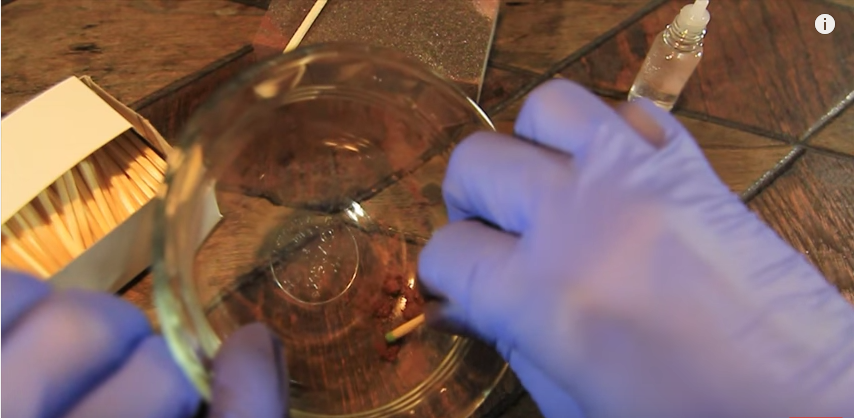
The first step is to take the sandpaper and carefully rub off the phosphorous on the strike pad of the matchbox. You want to collect as much of the phosphorous as possible without letting the dust get blown away or stuck to the sandpaper. Make sure that you are doing this project in an area where there is no wind or blowing air. It’s also a good idea to sand the strike pad over a piece of white paper in order to be able to see and collect the particles as they fall.
Try to use matchboxes that have large strike pads in order to get as much of the phosphorous as possible. It’s also important to use sand paper that has the right level of grit in order to prevent the powder from getting stuck on the pad instead of falling onto the paper. If you do things just right, you should be able to stretch the phosphorous you’ve collected and cover most of the matches in the box.
Take your cylinder or battery and roll it over the phosphorous to give it a more uniform and less-gritty texture. Again, choose an item that will cause the powder to fall off of the sides instead of sticking so that you can get as much as possible.
Mixing the Phosphorous
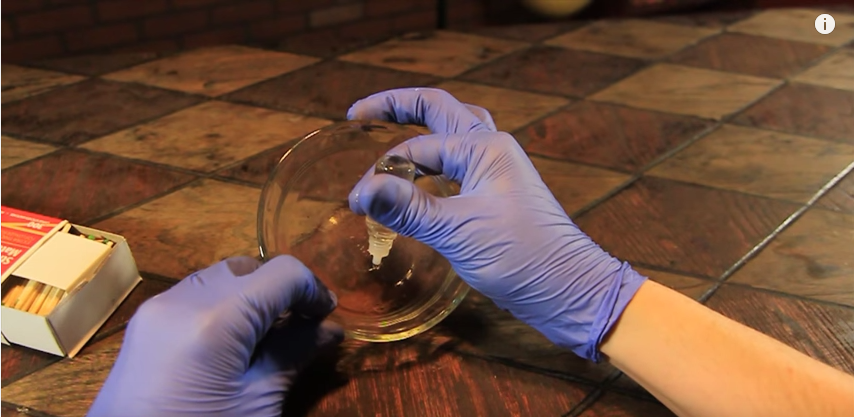
The next step is to carefully place the phosphorous dust into your container and add a few drops of water. Using a very small container, or even the underside of a lid from a pill bottle, may be better than larger alternatives. Take your stirrer and mix the water with the phosphorous until it develops the appearance and consistency of paint. You don’t need the mixture to be that thick, just thick enough to coat the matchsticks as you work your way through the rest of this project. However, it’s easier to add more water than it is to add more phosphorous. Carefully start with a couple of drops of water and keep adding and stirring until you get the right consistency.
Coating the Matches
Next, we want to coat the heads of each match so that the material is covered in an even layer of phosphorous paint. The easiest thing to do is gently dip the heads into the mixture and give the match a gentle twist to coat the entire head. Carefully pull it straight up so that the excess mixture can drip off. This will help to stretch resources and and allow you to coat more matches.
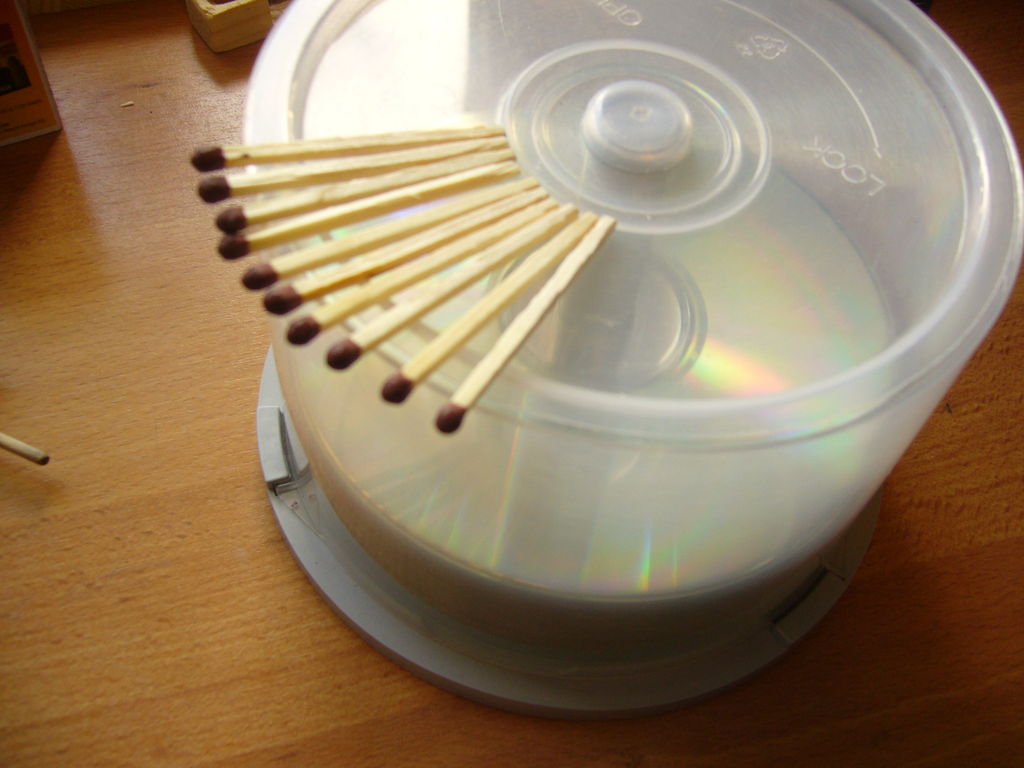
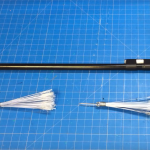
Take each match and place it atop the CD tower case so the heads are sticking out from the edge while the ends are resting against the center of the case. Keep placing the matches next to each other around the case until you end up with all of them fanning out from the center. These cases are perfect for this project because they usually have some kind of molding in the center to press the matches against while the heads hang over the edge to dry.
However, you can use almost any type of surface for this project, as long as the heads can hang off the edge. One alternative is to take a piece of duct tape and loop it so the adhesive can be pressed against the case while also creating a sticky surface to hold the matches in place. No matter what item or method you use for this step, make sure that the matches can dry evenly without falling down so the coating will remain intact.
Double-Coating with Match Heads
The next step is to take some more matches, scrape or cut off the material on their heads into a small pile. Take your battery or canister and grind down this powder as well. Add to your container, along with a couple of drops of more water in order to make another paste. Once the matches are dry, repeat the same dipping process before placing them back on the CD case.
All you need to do now is let the matches dry before storing them in a box or container of your choice. You should now be able to strike the matches against concrete, walls or even wooden surfaces as long as they are abrasive enough to cause friction to ignite the material. While this won’t work in every situation, it can be a great way to increase the effectiveness of your matches. Try it for yourself today, and see how this simple project can help to give you more options out in the field when needed the most.