How to Create an Effective Steam Pit
A good steam pit can be used for slow cooking certain types of food or keeping items warm for hours. It is very easy to build and can be put to use in almost any type of wilderness survival situation. Let’s look at some basic considerations that can help you to build an effective and efficient one the next time you are in the field.
Getting Started

The first step is to dig a big hole. The size of the hole will depend on the amount and type of items that you want to cook or keep warm. You can scale up or down as necessary, but keep in mind that it needs to be deep enough to place hot rocks along with multiple layers of vegetation. You also need room to place the foods that you want to keep warm as well. It’s always better to over instead of underestimate the size of the pit in order to avoid having to remove everything and dig a bigger hole.
Rocks and Fire
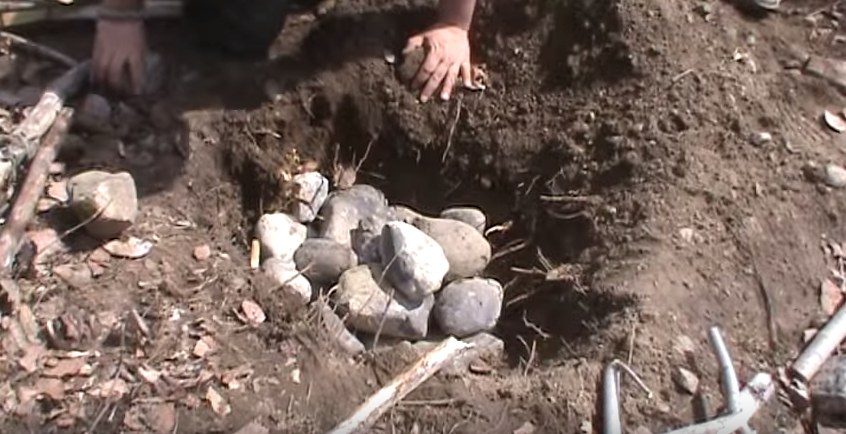
The next step is to decide whether you will heat the rocks with a fire inside of the pit or outside. In either case, you will need to heat the rocks for at least two hours before placing them in the pit. Take rocks that are dry and place them in the bottom of the pit to determine how many you will need along with their optimal placement. Next, decide if you will remove the rocks and heat them in a fire or build a fire on top of the rocks. If you choose to build a fire above the rocks, you will need to remove the wood and debris before continuing with this project. Both options have their advantages and disadvantages, so do a little bit of experimenting to choose the method that works best for you.
Layers
Once the rocks have been heated and placed in the pit, the next step is to add a layer of dirt and sand. Make this between 1-2 inches deep. This will help to trap and regulate the radiation of heat and make the pit hotter for a longer period of time. Dirt and sand also insulates the vegetation that you will add next from the rocks and prevent them from scorching or igniting.
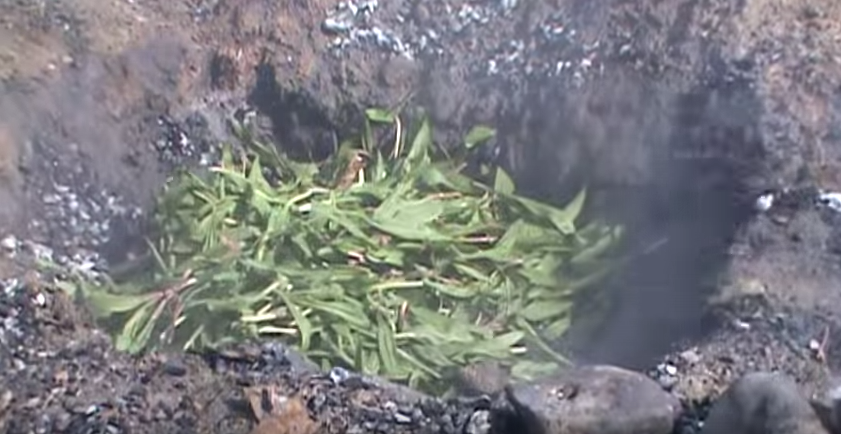
The next step is to add around 6-8 inches of moist vegetation to the pit. You want to choose vegetation that will not produce musty or foul odors which can permeate the food that you are trying to heat. Good examples of appropriate vegetation include grasses, cattail leaves, edible weeds, seaweed, pine needles (except for toxic ones such as ponderosa and loblolly), and fragrant leaves. Avoid using oak, walnut and cherry tree leaves. There are also certain ferns and herbs that should be avoided due to their toxicity. Make sure that you do a little bit of research before putting unknown items into the pit.
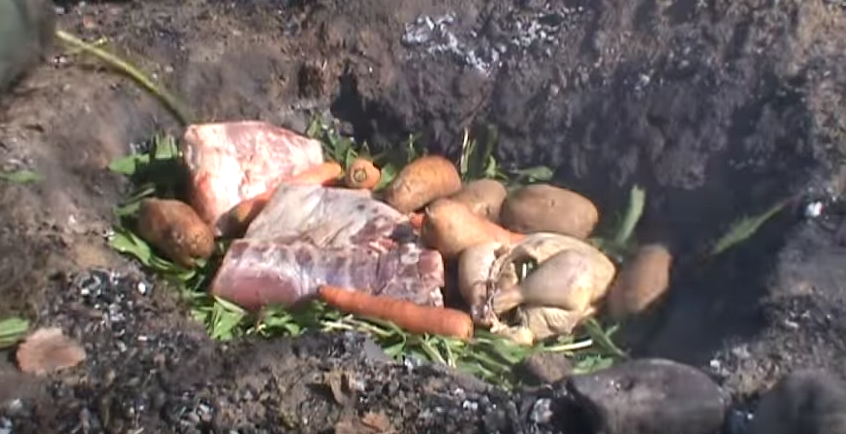
Once the vegetation has been added, place your food on top and cover with another 6-8 inches of material. The heat from the stones will radiate through the vegetation and surround the food with a consistent measure of hot steam. Add some bark or fabric atop the second layer of vegetation before adding another inch of dirt. This will help to prevent steam from escaping and maximize the amount of time that the unit will remain hot.
Consider adding a little bit of water to the top layer of vegetation to increase steam production. If you are working with a pit that is saturated with moisture at the bottom, make a thin layer of smaller stones before placing the larger, hot rocks on top. This will prevent heat from being drawn into the dirt below and improve the overall efficiency of the steamer.
Keep in mind that the density of the rocks, the amount you use and the time you let them heat up will all contribute to the temperature of the steamer. However, following these basic steps can help you to generate steam to cook many foods as well as keep items warm for long periods of time. This simple trick can help you to save time, energy and fuel from having to maintain a fire. It will also allow you to do other things instead of keeping an eye on your food all the time. Try it for yourself the next time you’re in the wilderness, and feel free to improvise in order to create the perfect steamer for your needs.