How to Make a Sturdy Table out of PVC
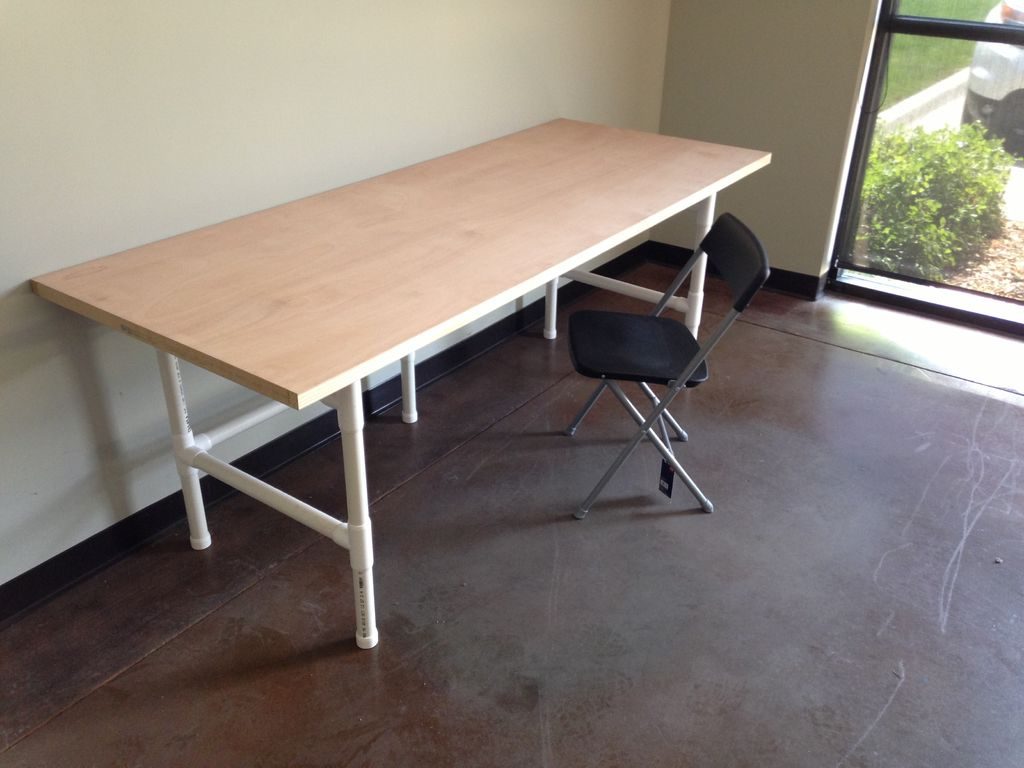
One of the easiest, yet underutilized uses for PVC is to make a frame for a table or workbench. This does take a little bit of planning and a good deal of material, but the finished product is definitely worth the effort. One of the biggest advantages is that the table will be much lighter and about as durable as something that you could fashion out of scrap wood. Take a look at the steps below and see how this makes for a great weekend project that can be just as useful now and in the future as well.
Required Items:
5 pieces of 3” long PVC pipe
10 pieces of 12” long PVC pipe
4 pieces of 20” long PVC pipe
4 pieces of 30” long PVC pipe
Consider working with PVC pipe that is plumbing-grade and at least 1¼ – 1½ inches in diameter. This will provide you with enough support to give the table a decent amount of strength and stability. However, if you are scaling down or want to build a smaller table than the one outlined here, feel free to use a smaller sized pipe. Remember, you can improvise any part of this project as long as you follow similar steps.
You will also need:
5 External caps
5 Table caps
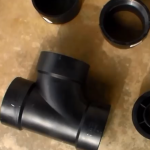
4 Four way T connectors
4 Regular T connectors
2 Four way T cross connectors
Screws to connect the table top to the frame (optional)
Getting Started
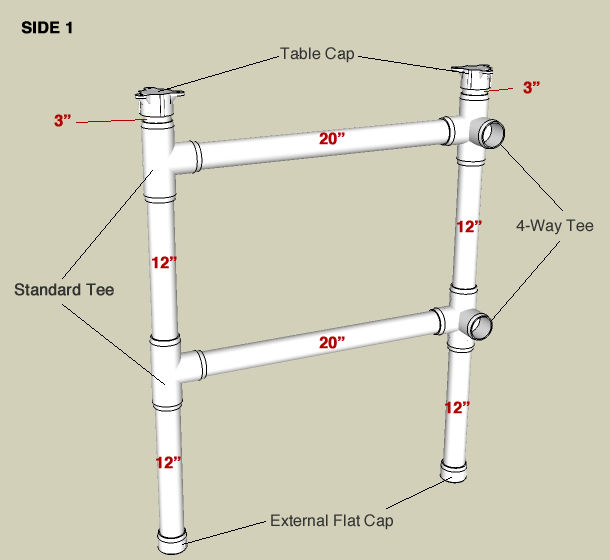
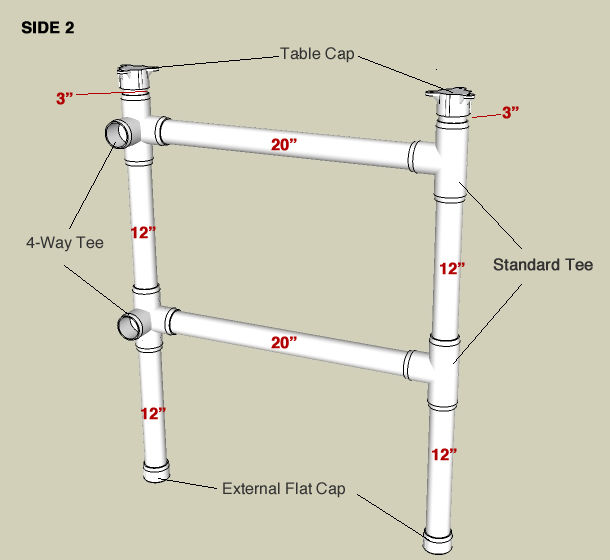
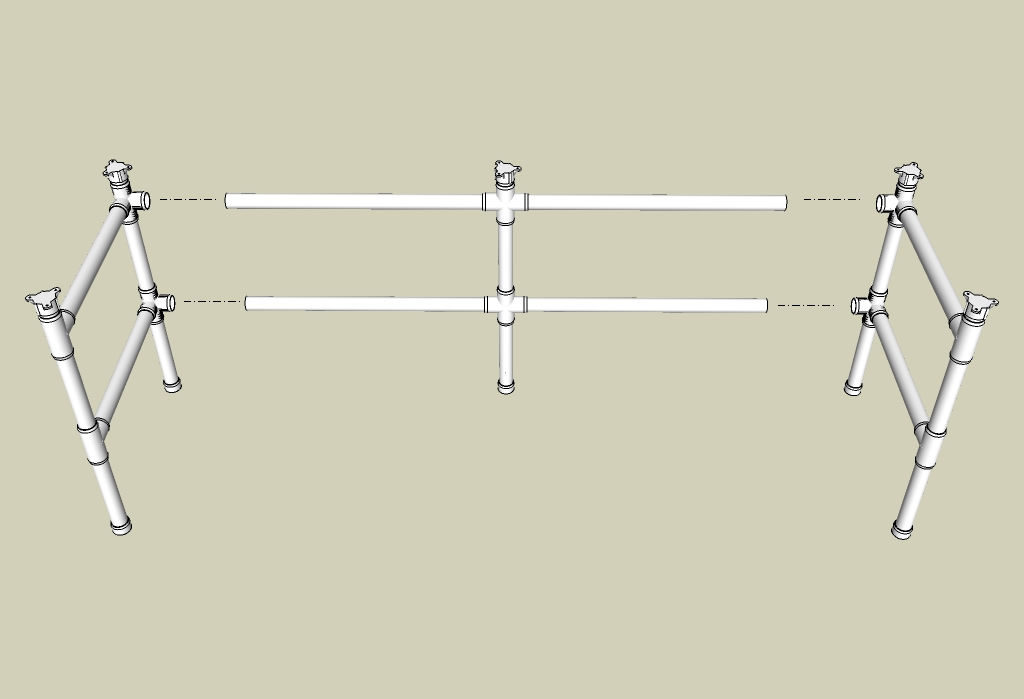
The first step is to build the leg assemblies which will be at the far ends of the table. Take two 12” pieces of PVC and connect them together with a standard T fitting on one side. Attach another standard T fitting to the top end of the pipe. Attach the 3” pieces of PVC to the top of this connector before attaching the table cap to the end. Attach a regular end cap to the bottom end of the pipes as well. Next, connect two 12” pieces of pipe with a Four way T connector, attach another Four way T connector on the top, insert another 3” piece of PVC pipe before capping off the ends in the same manner.
All you need to do now is join the two sides of each leg assembly with a 20” piece of PVC pipe. Repeat this process for the other leg assembly. Make sure that T connectors are facing in the same direction. For one leg assembly, the T connector should be on the right side. For the other, it should be on the left, and they should both be facing each other.
The Back of the Frame
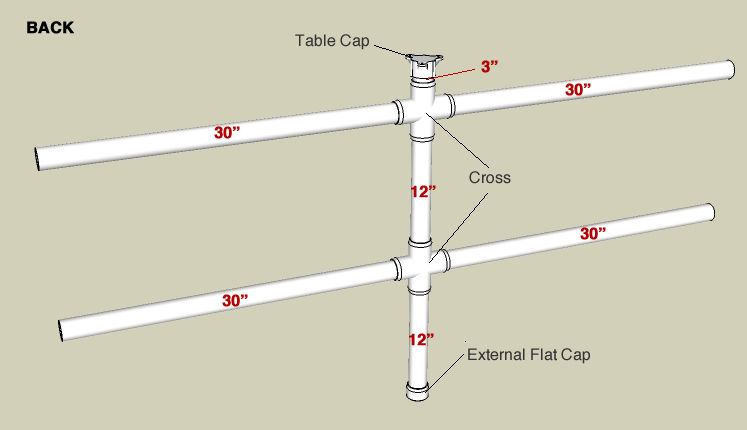
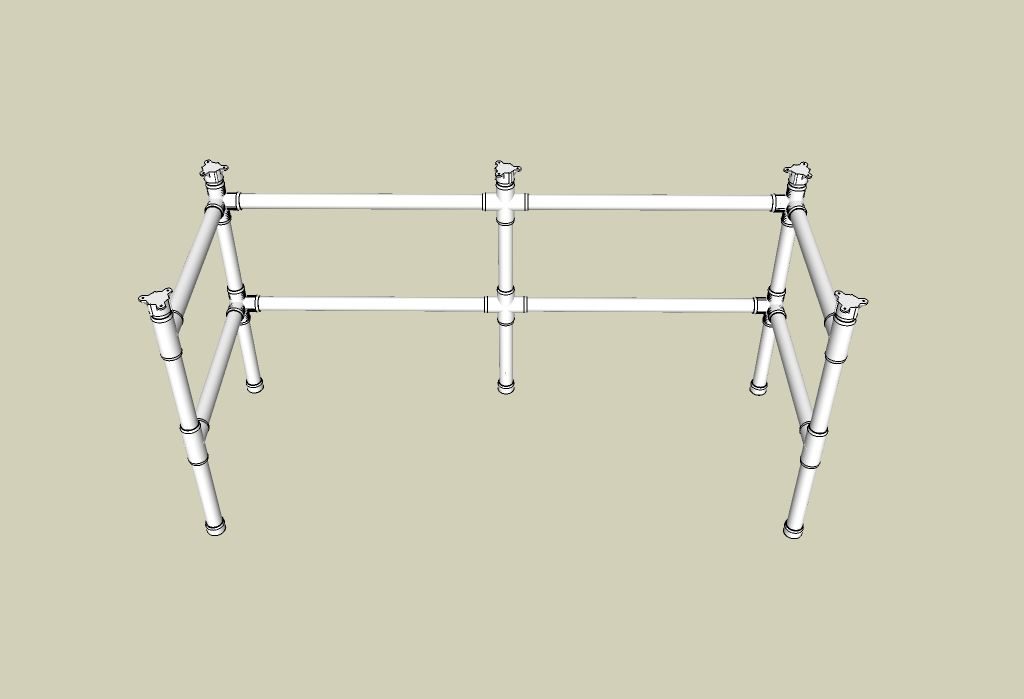
Next, we will create the backside of our U-shaped frame. Take two more pieces of 12” PVC pipe and connect them with one of the cross connectors. Attach another cross connector on the top of the pipe. Attach one more 3” inch piece of PVC into the connector before capping the top and bottom off. Attach one of the 30” long pieces of pipe to each of the openings on the cross connectors. You should have four.
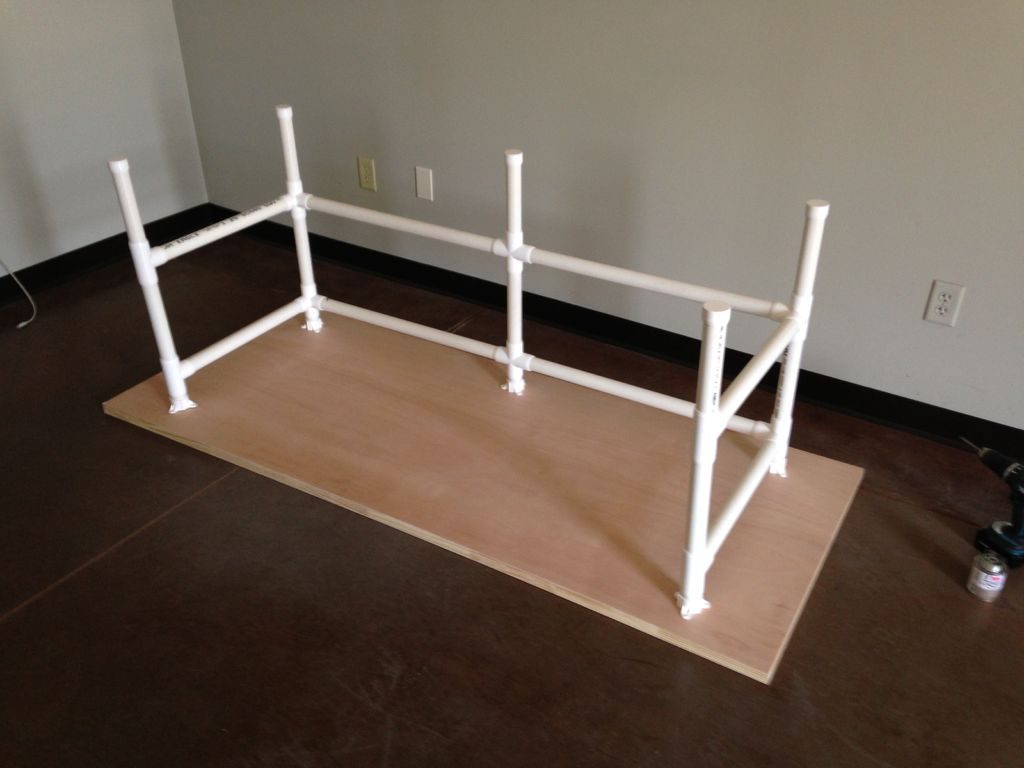
All you need to do now is connect the 30” pieces of PVC to the respective connectors on the legs. Check to see that the fittings are as snug and uniform as possible, and make adjustments as necessary. The next thing is to decide whether or not to glue the pieces together or whether or not you want the table top to be attached to the frame. Choose the option that works best for you and proceed accordingly.
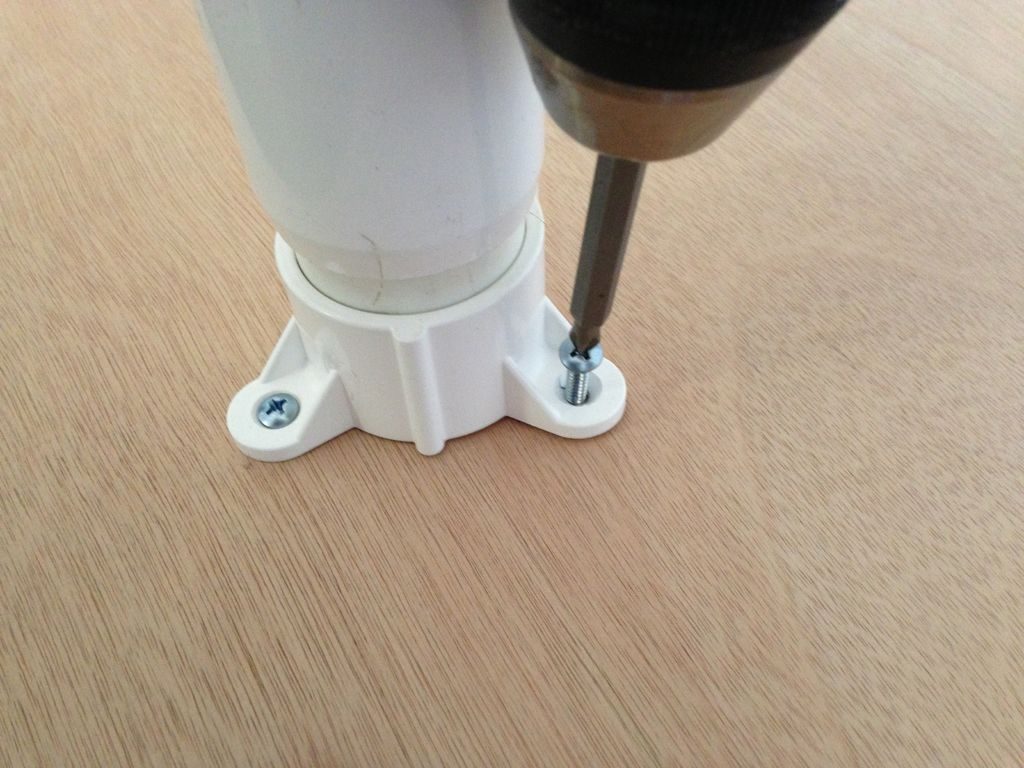
If you decide to attach the tabletop, consider securing it in place before gluing any of the PVC together. This will allow you to make adjustments as necessary. Use the screws to secure the material from the bottom up, using the holes on the end caps as a guide.
Try this project out for yourself, and see how following these simple steps can give you access to a table in just a couple of hours.


