How to Build a Bushcraft Bucksaw!! “The 15 minute Saw”
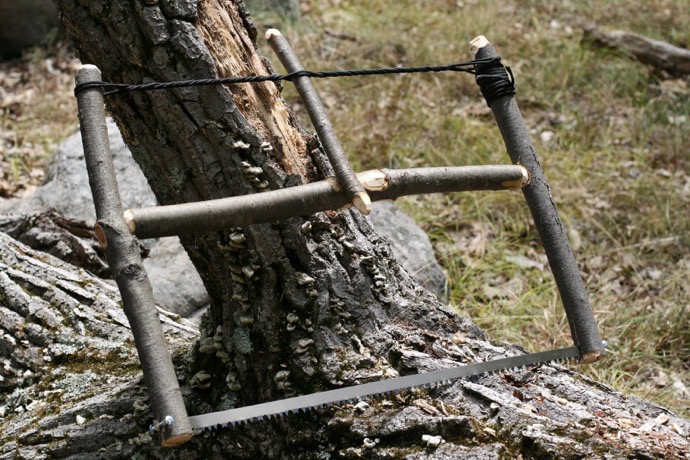
Say you have a nice saw blade but no handle. You can make a really simple but effective bucksaw with some sticks and basic materials. Follow the steps below to get a sense of how to put it together, and feel free to modify this project to suit your own purposes.
Material
1 buck saw blade
2 cotter or split pins
4 feet of cordage
1 Y branch that is the same length as the blade
1 straight branch that is the same length as the blade
2 straight branches 2/3 the length of the blade
1 straight branch ½ the length of the branches above
Preparing the Wood
Choose branches that are around an inch in diameter for optimal structural support. They should be sturdy, in good condition and completely dry, but not crumbly. The idea is to make a box frame that will fit over the saw blade, but it needs to be strong enough to withstand the forces you will place on the saw when cutting.
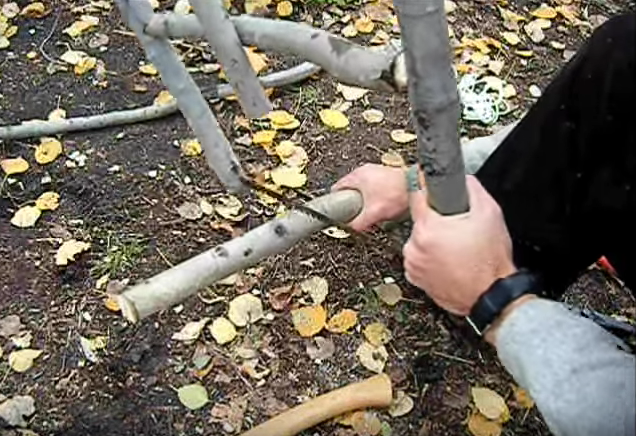
The best way to secure everything together is to cut notches and grooves in the branches. The two short branches that are 2/3 the length of the blade will be used as the sides of the frame. Trim the branches so that each of the ends are flat. Cut a notch about ½ to 1 inch from the bottom of each of these branches to use as an anchor for the blade. Make sure the notches align when the branches are next to each other, otherwise the blade will be lopsided.
The next step is to cut notches and grooves to join the branches together. The Y blade will be placed horizontally between the blade and the top piece of wood as a support structure for the frame. Consequently, you will need to cut two grooves on one of the side branches and one groove on the other. You will also need to cut a groove about ½ inch from the top of each side branch for the top piece of wood. Cut notches in all three ends of the Y branch and both ends of the top branch as well.
Fit everything together to ensure the branches seat properly, and make adjustments as necessary. You can also eliminate the branch for the top portion of the frame and use cordage to hold everything together, but this will make the saw a little more flimsy and difficult to handle.
Securing the Frame
You have a couple of options when it comes to securing everything together. First, you can cut the grooves for the blade all the way through the branches. Insert the blade and secure it with the cotter pins on either side. You can also use the cordage to apply tension to the frame by wrapping it around each side stick and tying it off in the middle.
Take the short stick and insert it between the two pieces of cordage in the middle of the saw. Place the stick over the top string and under the bottom one. Twist the stick and watch the cordage tighten and pull the frame sticks together. Once you’ve created enough tension, let go of the stick and it should seat itself and anchor everything in place along one of the Y branches.
Test the Saw
All you need to do now is test the saw to make sure that the frame remains intact and sturdy. Keep in mind that the effectiveness of the saw will depend on the quality of the branches and freshness of the blade. The amount of tension that you place on the frame with the cordage will also influence effectiveness as well. Make adjustments as necessary until everything is just right, and see how this is a fantastic way to build an emergency saw when other options aren’t available.


