How to Make Dehydrated Broth at Home

Using bullion cubes or dried broth is a great way to condense supplies and hopefully extend their shelf life. Commercial products are often loaded with additives and preservatives, in addition to a high level of sodium. You can make your own product at home in a few easy steps, and this is a great way to take control over what you and your family are eating if you ever need to rely on your food stockpile.
Getting Started
The first step is to choose between making bone or meat broth. Both can be processed into concentrated powder and stored for a long time. The general consensus is that bone broth is easier and more practical for making dehydrated bullion. To make bone broth, take your carcass that has been mostly stripped of the meat and put into a stockpot. Add kitchen scraps and veggies and then fill with filtered water until everything is covered. Add a couple of teaspoons of lemon juice or vinegar, depending on the size of your batch, and bring to a boil.
Reduce heat to a low simmer and let cook for a couple of days. Chicken products finish in about two days whereas beef will need about three to draw out all of the nutrients and flavors. Stir occasionally and add water as necessary. Remove bits of meat that fall off the bone and rise to the top and discard. Once the process is finished, strain the liquid into smaller containers, add salt to taste, and place them in the refrigerator overnight.
Processing the Broth
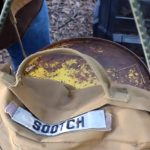
The first step is to separate the fat from the broth once it has cooled. Simply skim off the fat (you will be able to see how it rises to the top and solidifies and discard or use for other recipes. Then, take the remaining liquid and place into another pot and bring to a boil. Stir occasionally as the water evaporates and leaves behind a sticky, pasty residue that will be what is processed into the broth. Use a spatula as it thickens to stir the broth in order to prevent scorching.
It will take some practice to get a feel for when the broth is ready to be processed. If it is too runny, it may not hold its shape on the dehydrator. If it is too thick, it may not spread easily, and you may end up with clumps of goo along with powder. You want to aim for broth that is thick but not too runny, and always err on the side of caution in terms of when to remove the broth from heat. It’s better to under-cook the broth and bring back to heat for a few additional minutes than to overcook it and lose the batch.
It is better to use a dehydrator for this process, but you can use a baking sheet and put it in the oven over very low heat as an alternative as well. The trick is to keep the temperature around 140-150 degrees and let the moisture evaporate slowly. Spread the remaining broth on some parchment or similar paper and use a spatula to create a layer that is about an eighth of an inch thick.
Expect it to need about three days to fully-dry, but this can vary depending on local weather conditions as well as the density of the material you are processing. Once it has been dried completely, you can break the broth sheet into smaller chunks and grind into a powder with your food processor or coffee grinder. If you notice some remaining moisture, simply place the ground mix back on the dehydrator and continue to let it dry. Never store any powder that still has moisture, otherwise it can promote bacterial and mold growth.
Store the broth in a mason jar or other airtight container, leaving as little headspace as possible. To rehydrate, simply take a tablespoon of broth and add to a cup of boiling water, but you can use more or less powder based on how much flavor you want in your recipe.
While this process takes a lot of time to complete, the payoff is worth the wait. One jar can produce at least a year’s worth of broth, and you can tuck it away in a corner of your storage area. Try it out for yourself and see how this is a fantastic alternative to making and using broth from scratch.