You can avoid the need to buy adapters or universal charging devices for your phone and other devices that use small batteries simply by using paperclips. All you need is a cable that can be frayed on one end and plugged into an outlet or USB port on the other, two paperclips and perhaps some tape. The entire process can be completed in less than a couple of minutes, and this will work on any battery as long as you can make a good connection with the components.
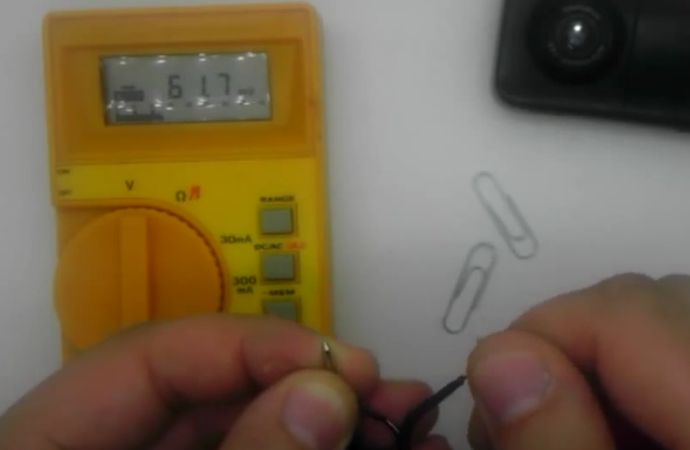
The first step is to remove the end piece from your charging cable and prune away the insulating lining. Make sure that you have enough exposed wire to wrap around each paperclip. The next step is to test to see which wire is positive and which is negative. Most cables do not have colored wires inside, so you will either need to use a voltmeter or your tongue to determine which wire is live. Mark the wire so that there won’t be any confusion later. The last thing you want is to short-circuit your battery by getting the wires crossed.
The next step is to unwind the paperclips and remove any decorative or insulating covering from their ends. This will ensure that metal to metal contact will be made between them and the battery. Bend the ends of the paperclips so that they will form a bracket around the battery. Unplug the power cable and attach each wire to the bottom of their corresponding paperclip. Make sure they don’t touch in case there is a residual charge flowing through the unplugged wires.
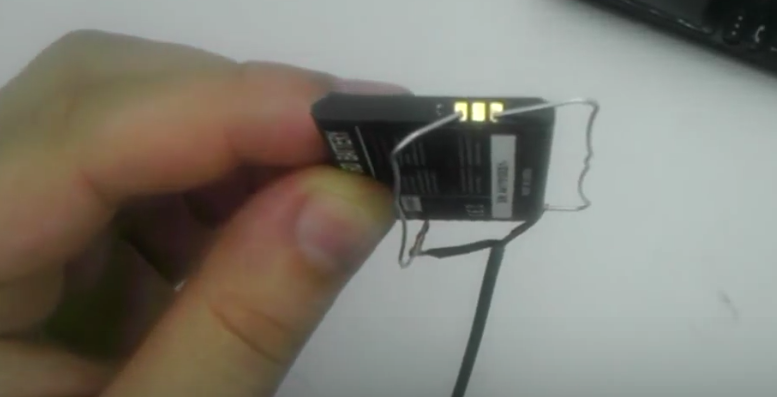
Attach the live wire and paperclip to the positive connector at the top of the battery and brace it in place by bending the paperclip around the bottom. Repeat the process for the negative terminal. Most lithium-ion phone and device batteries will have both the positive and negative connectors situated on the top, and they are usually very small. Make sure that the paperclips are making secure contact with the corresponding connections. You may also need to test the battery connections with the voltmeter if they are not clearly marked as positive or negative.
You can plug in the charger once the paperclips are securely attached to the battery and anchored in place. Make sure that the positive wires do not touch. You can add some electrical tape to the points where the paperclips meet the wires for some additional stability and short-circuit prevention. All you need to do now is wait for the battery to charge. The amount of time that it will take will depend on the size of the battery as well as the quality of the metal that the paperclip is made from.
You can also use this trick on larger rechargeable batteries as well simply by connecting a series of paperclips together so they are long enough to make contact and be secured around the battery. Try this trick out for yourself and discover how easy it is to keep your devices powered even if you don’t have the appropriate accessories on hand at the time.